Create a Golang Web Server in Under 5 Minutes ⚡️
Create a Go web server in under 5 minutes in the lightning-fast tutorial.

So you've decided to use Go to stand up your next web server, but you're not quite sure where to start.
In this ⚡️ Lightning Tutorial™, we'll creating a Go web server from scratch in a matter of minutes so let's get started.
1. Download and install the Go binary
Visit https://go.dev/dl and select the download for your operating system or install from source.

2. Setup your project structure
From your terminal, setup a simple project structure for your Go web server like so:
# create the project directory
mkdir go-server

# change directories
cd go-server

# create the file where we'll write our code
touch server.go
Next up, open up your IDE or text editor so we can begin writing some code!
3. Writing the code for your Go web server
Now that we've got our project structure created, let's get the code for our simple Golang web server going.
In server.go, start by declaring the package, importing the fmt, io, and net/http packages from the Go standard library, and stubbing out the main function like so:
package main

import (
	"fmt"
	"io"
	"net/http"
)

func main() {

}A quick overview of the packages we just imported from the Go standard library
fmt: Used to format inputs and outputs, for example, it allows us to easily print text to the console or format strings.
io: Handles inputs at a lower-level than the aforementioned fmt package, providing helpful interfaces that allow us to more easily read from and write to files, network connections, and other data streams.
net/http: Another fundamental library that provides us with out-of-the-box HTTP client and server implementations.
Adding a request handler
In order for a server to send and receive traffic over HTTP, we need to create a request handler that will receive inputs from clients and send responses accordingly.
Let's add a simple request handler.
package main

import (
	"fmt"
	"io"
	"net/http"
)

// add the request handler
func requestHandler(w http.ResponseWriter, r *http.Request) {
	// write a simple response back to the client
	io.WriteString(w, "Hello, CodeSnippet.io!")
}

func main() {

}Next up, we need to register our request handler and start our Golang web server, which we can do pretty easily.
package main

import (
	"fmt"
	"io"
	"net/http"
)

func requestHandler(w http.ResponseWriter, r *http.Request) {
	io.WriteString(w, "Hello, CodeSnippet.io!")
}

func main() {
	// register the request handler,
    // which accepts requests at the /api route
    http.HandleFunc("/api", requestHandler)

    // log some details to the console
    fmt.Println("Server listing on port 4500...")

    // start the web server process to begin handling requests
    http.ListenAndServe(":4500", nil)
}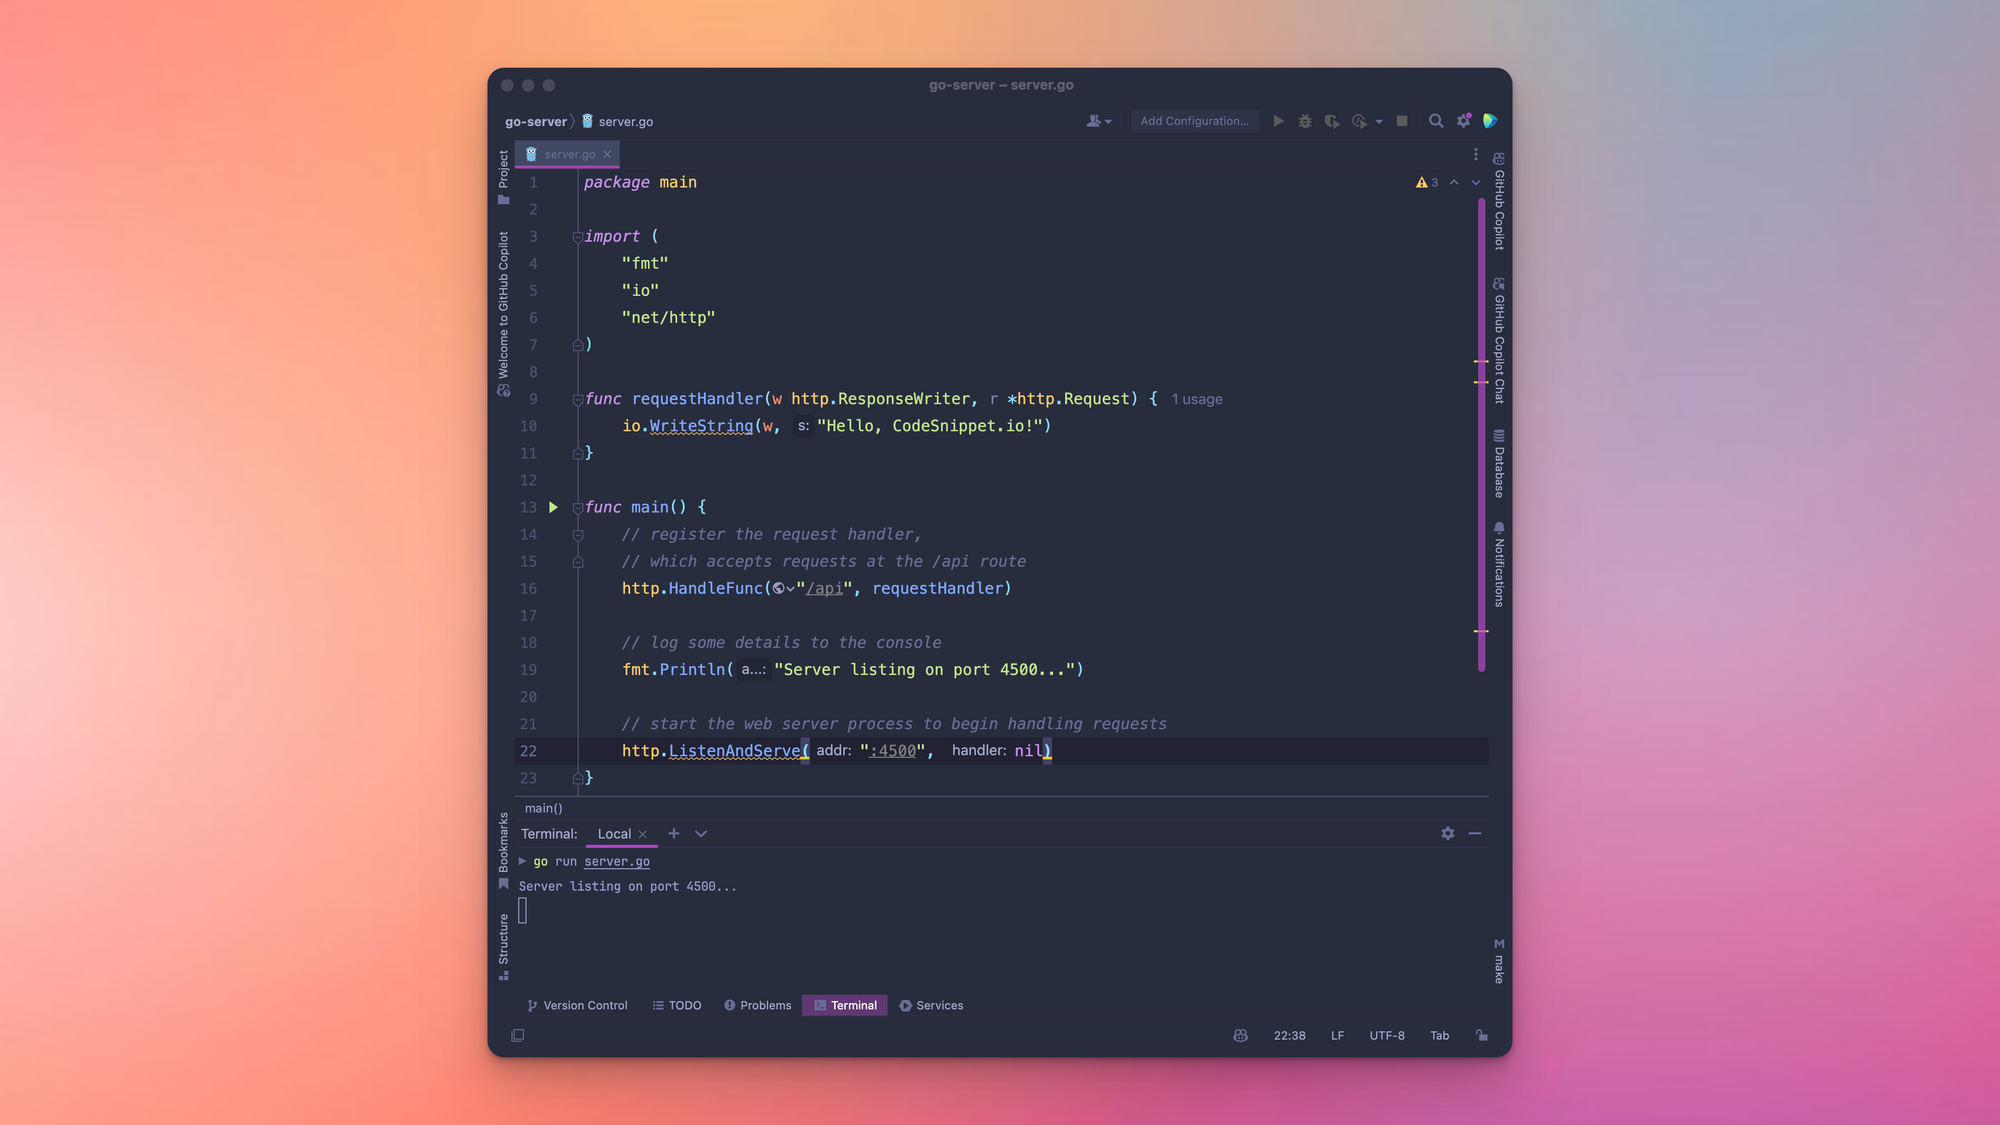
4. Start the server
Lastly, let's fire up our server and send a request!
From your terminal, within the root of your project directory, run:
go run server.go
If all goes well, you'll see some text output to your terminal indication that the server is started.
5. Send a request
Using a REST client, such as Insomnia, we can send a simple API request like so:
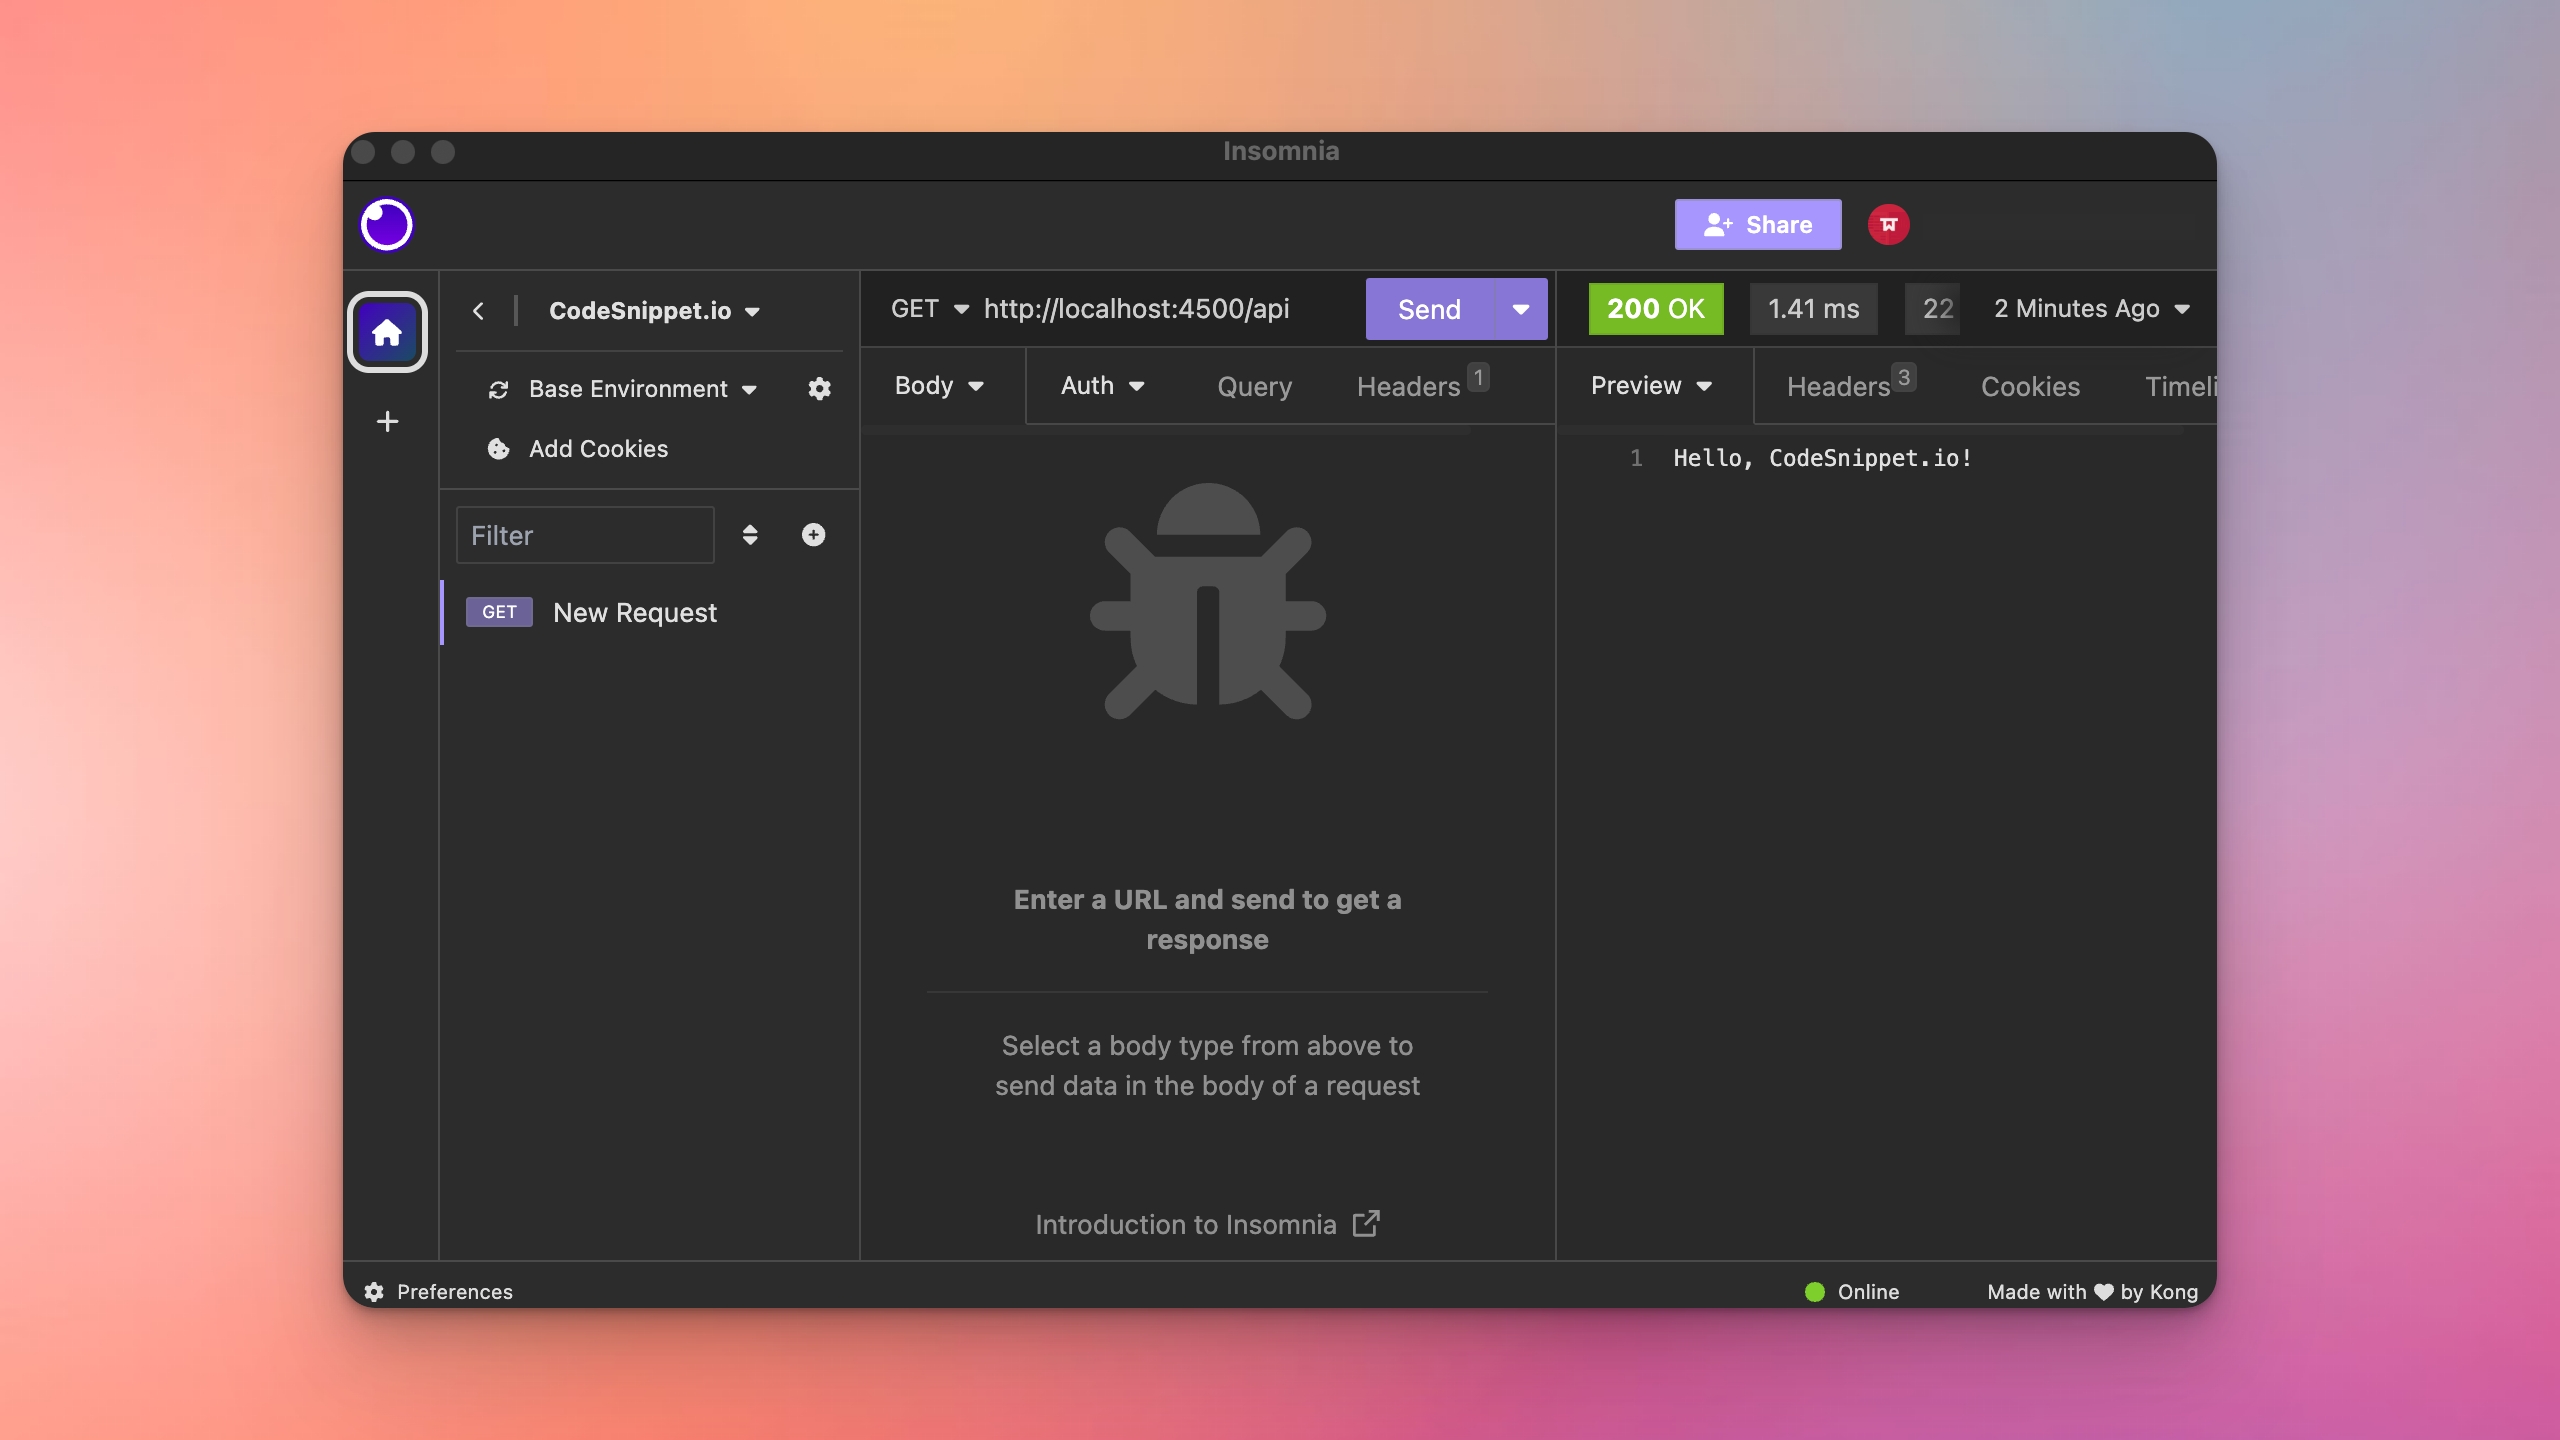
Alternatively, if you don't have a desktop REST client handy, you can send a request from your terminal using curl via:
curl --request GET \
  --url http://localhost:4500/api
Great work!
In under 5 mins, we've learned quite a bit about Go and we're sending API requests to our new web server.
What's next?
So now that we've setup our simple Golang web server, you can now take this project and run with it!
How might we make our server more practical such that it accepts JSON input from the client and returns a dynamic response? How can we add additional endpoints?
Try extending this lightning tutorial to fit your needs and drop a link to your GitHub repo in the comments below, or if you're feeling daring, share it with our community on pairprogram.com and for some guidance and feedback!
Help us improve our content