Build a Full-Stack Weather App In Under 60 Minutes
Build a stunning full-stack weather app in under 60 minutes with this step-by-step tutorial using HTML, CSS, and JavaScript!
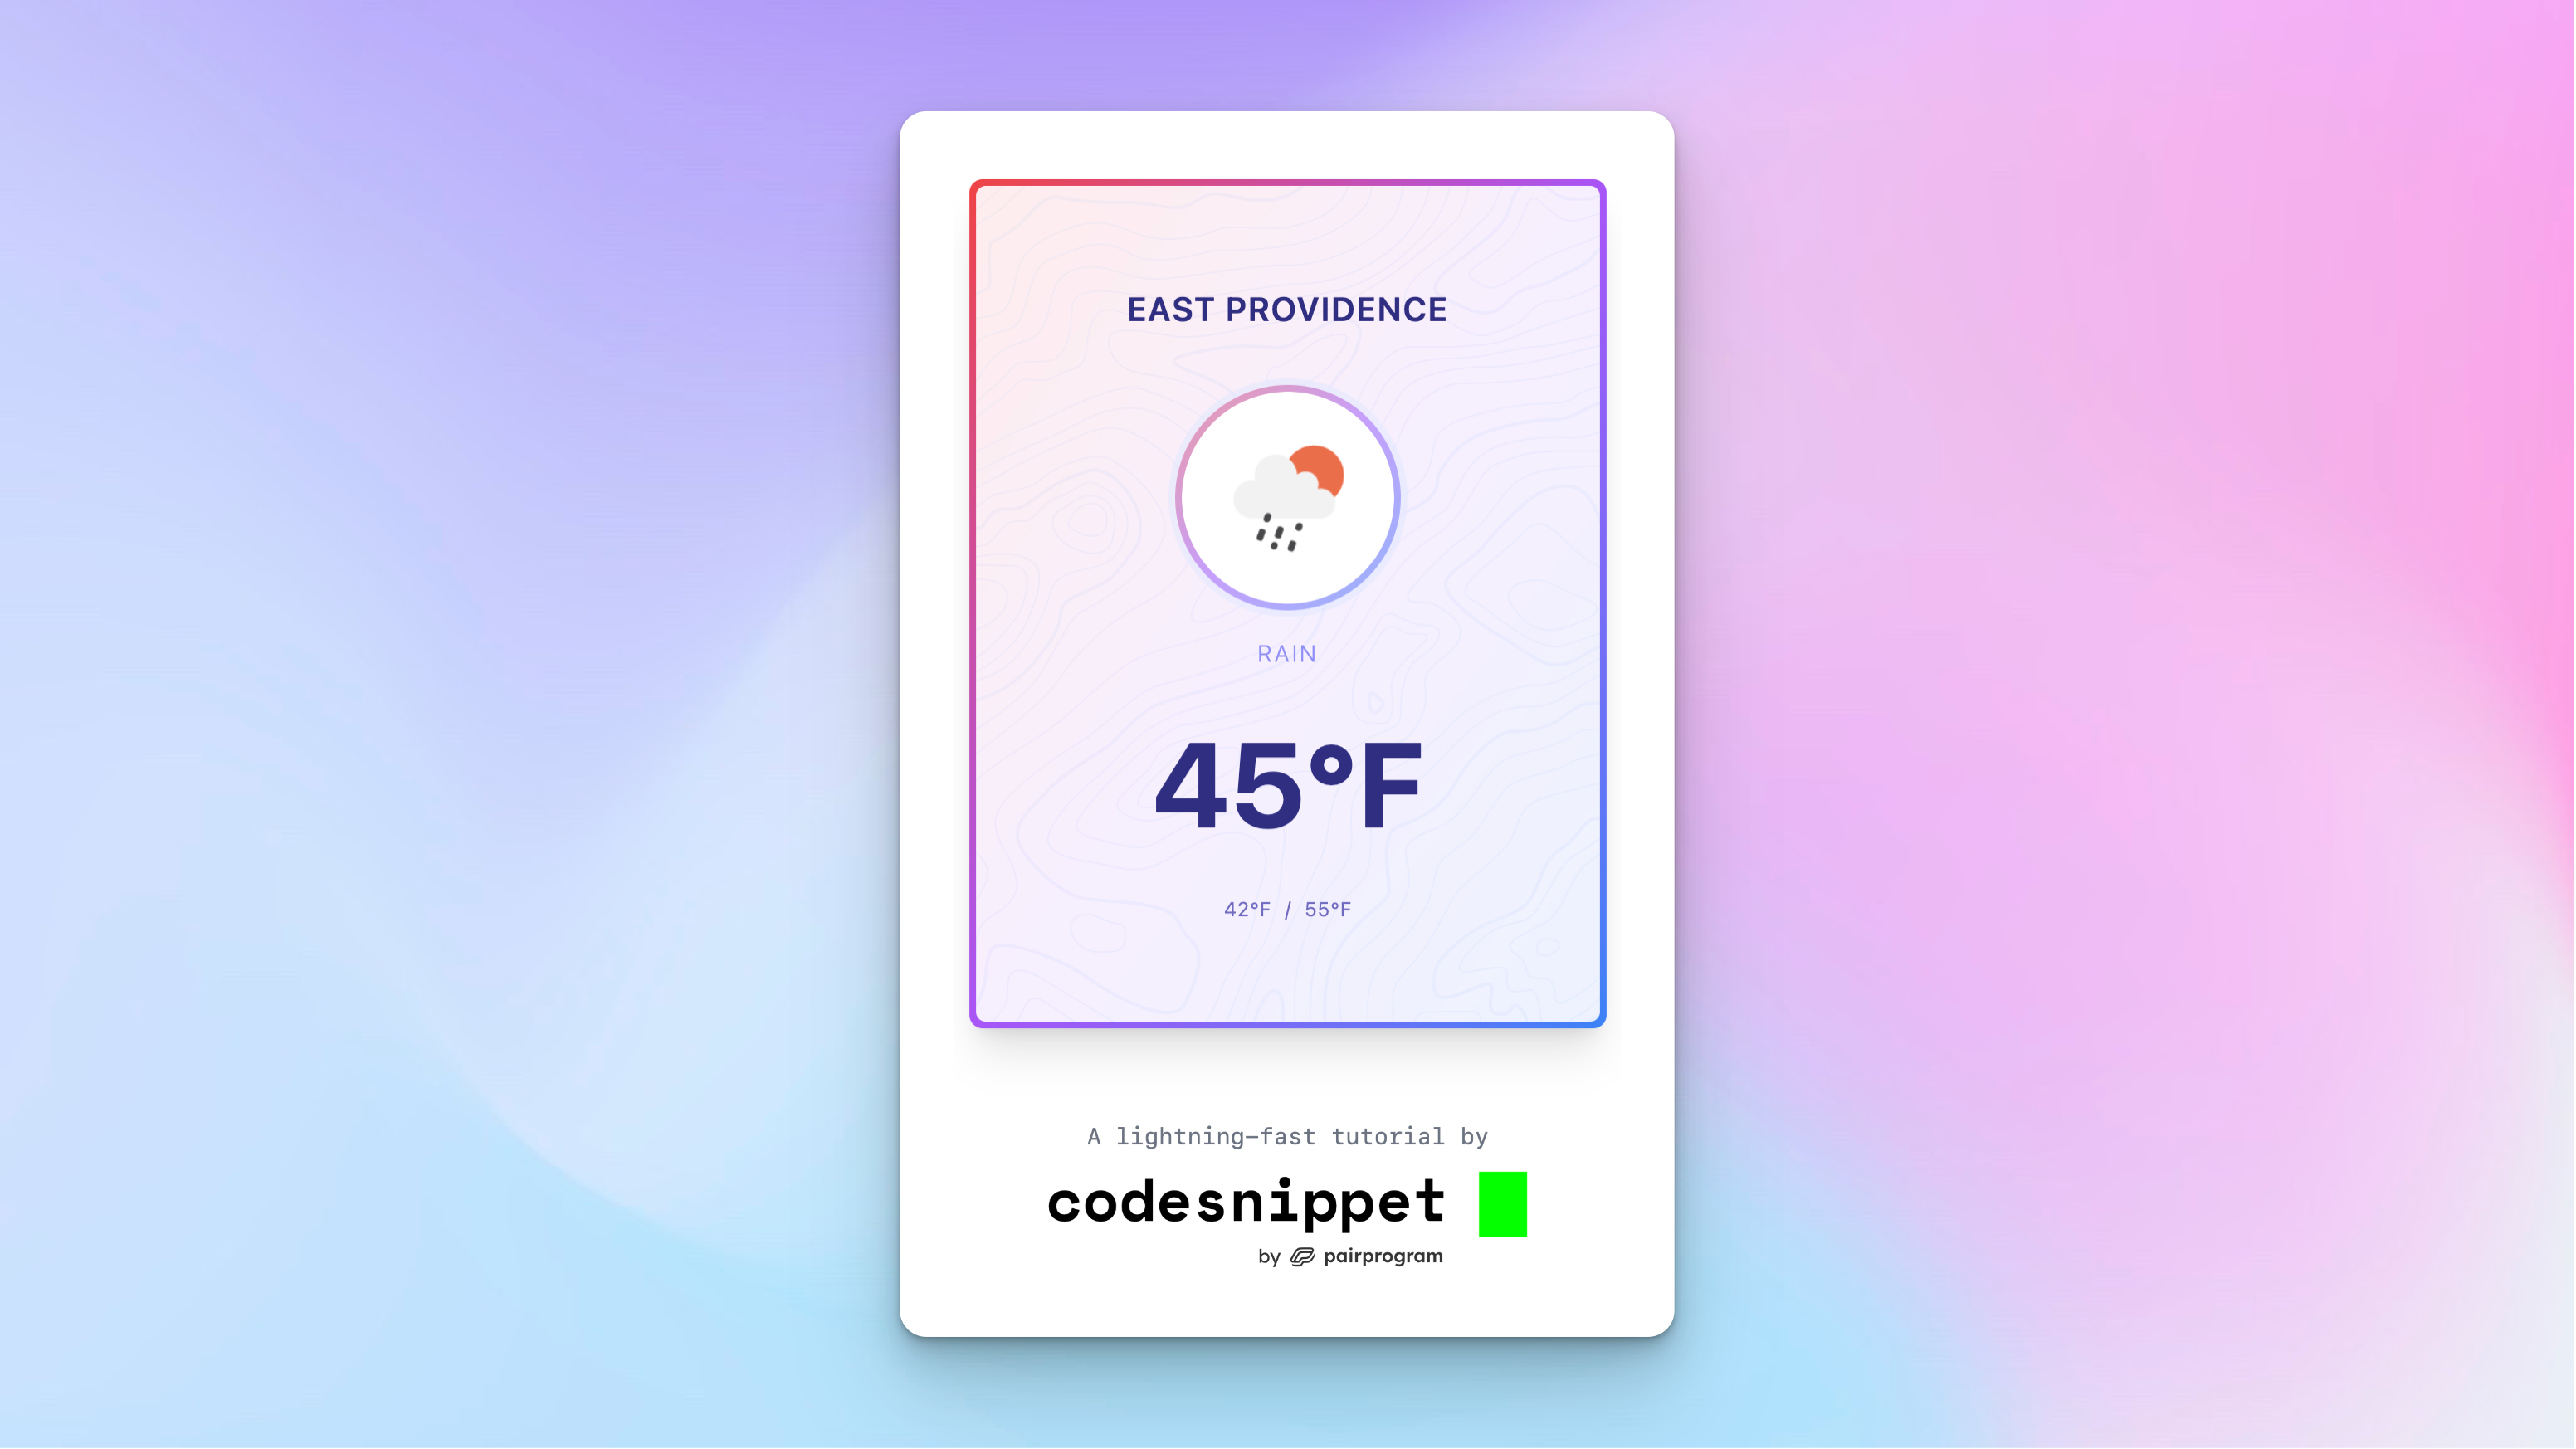
Today we're going to learn how to build a full-stack weather application in under an hour.
When we're done, this stunning full-stack weather application is something you'll be able to show off to friends and family, but what's it made of under the hood?
Project requirements
Let's outline a few of the project requirements so we can stay aligned as we are building this thing.
Our app should:
- Display the user's location
- Display the current temperature for the user's location
- Display the min and max temperatures of that day for the user's location
- Display a description of the current weather, e.g. "Sunny", "Rainy", etc.
- Display an eye-catching visual corresponding to the current weather
What's under the hood
- HTML, CSS, and JavaScript on the frontend
- Tailwind CSS for adding beautiful styles to our app faster
- Node.js and Express.js on the backend
- Integration with OpenWeather API for fetching real-time weather data
- Integration with the
Navigator.geolocationWeb API to determine the user's GPS coordinates
Navigator.geolocation Web API here: https://developer.mozilla.org/en-US/docs/Web/API/Navigator/geolocationHow it will work
At a high-level, here's how our full-stack weather app will work.
- User visits the web application at
http://localhost:3000 - They are prompted by their web browser to allow location access to the app
- Once the user allows location access, the user's approximate GPS coordinates available to our app
- We write some code that sends the coordinates to our backend server
- The coordinates are then used to send a request to the 3rd-party OpenWeather API to retrieve the current weather data for that location
- The weather data is returned to the frontend and used to update the UI
Let's get started
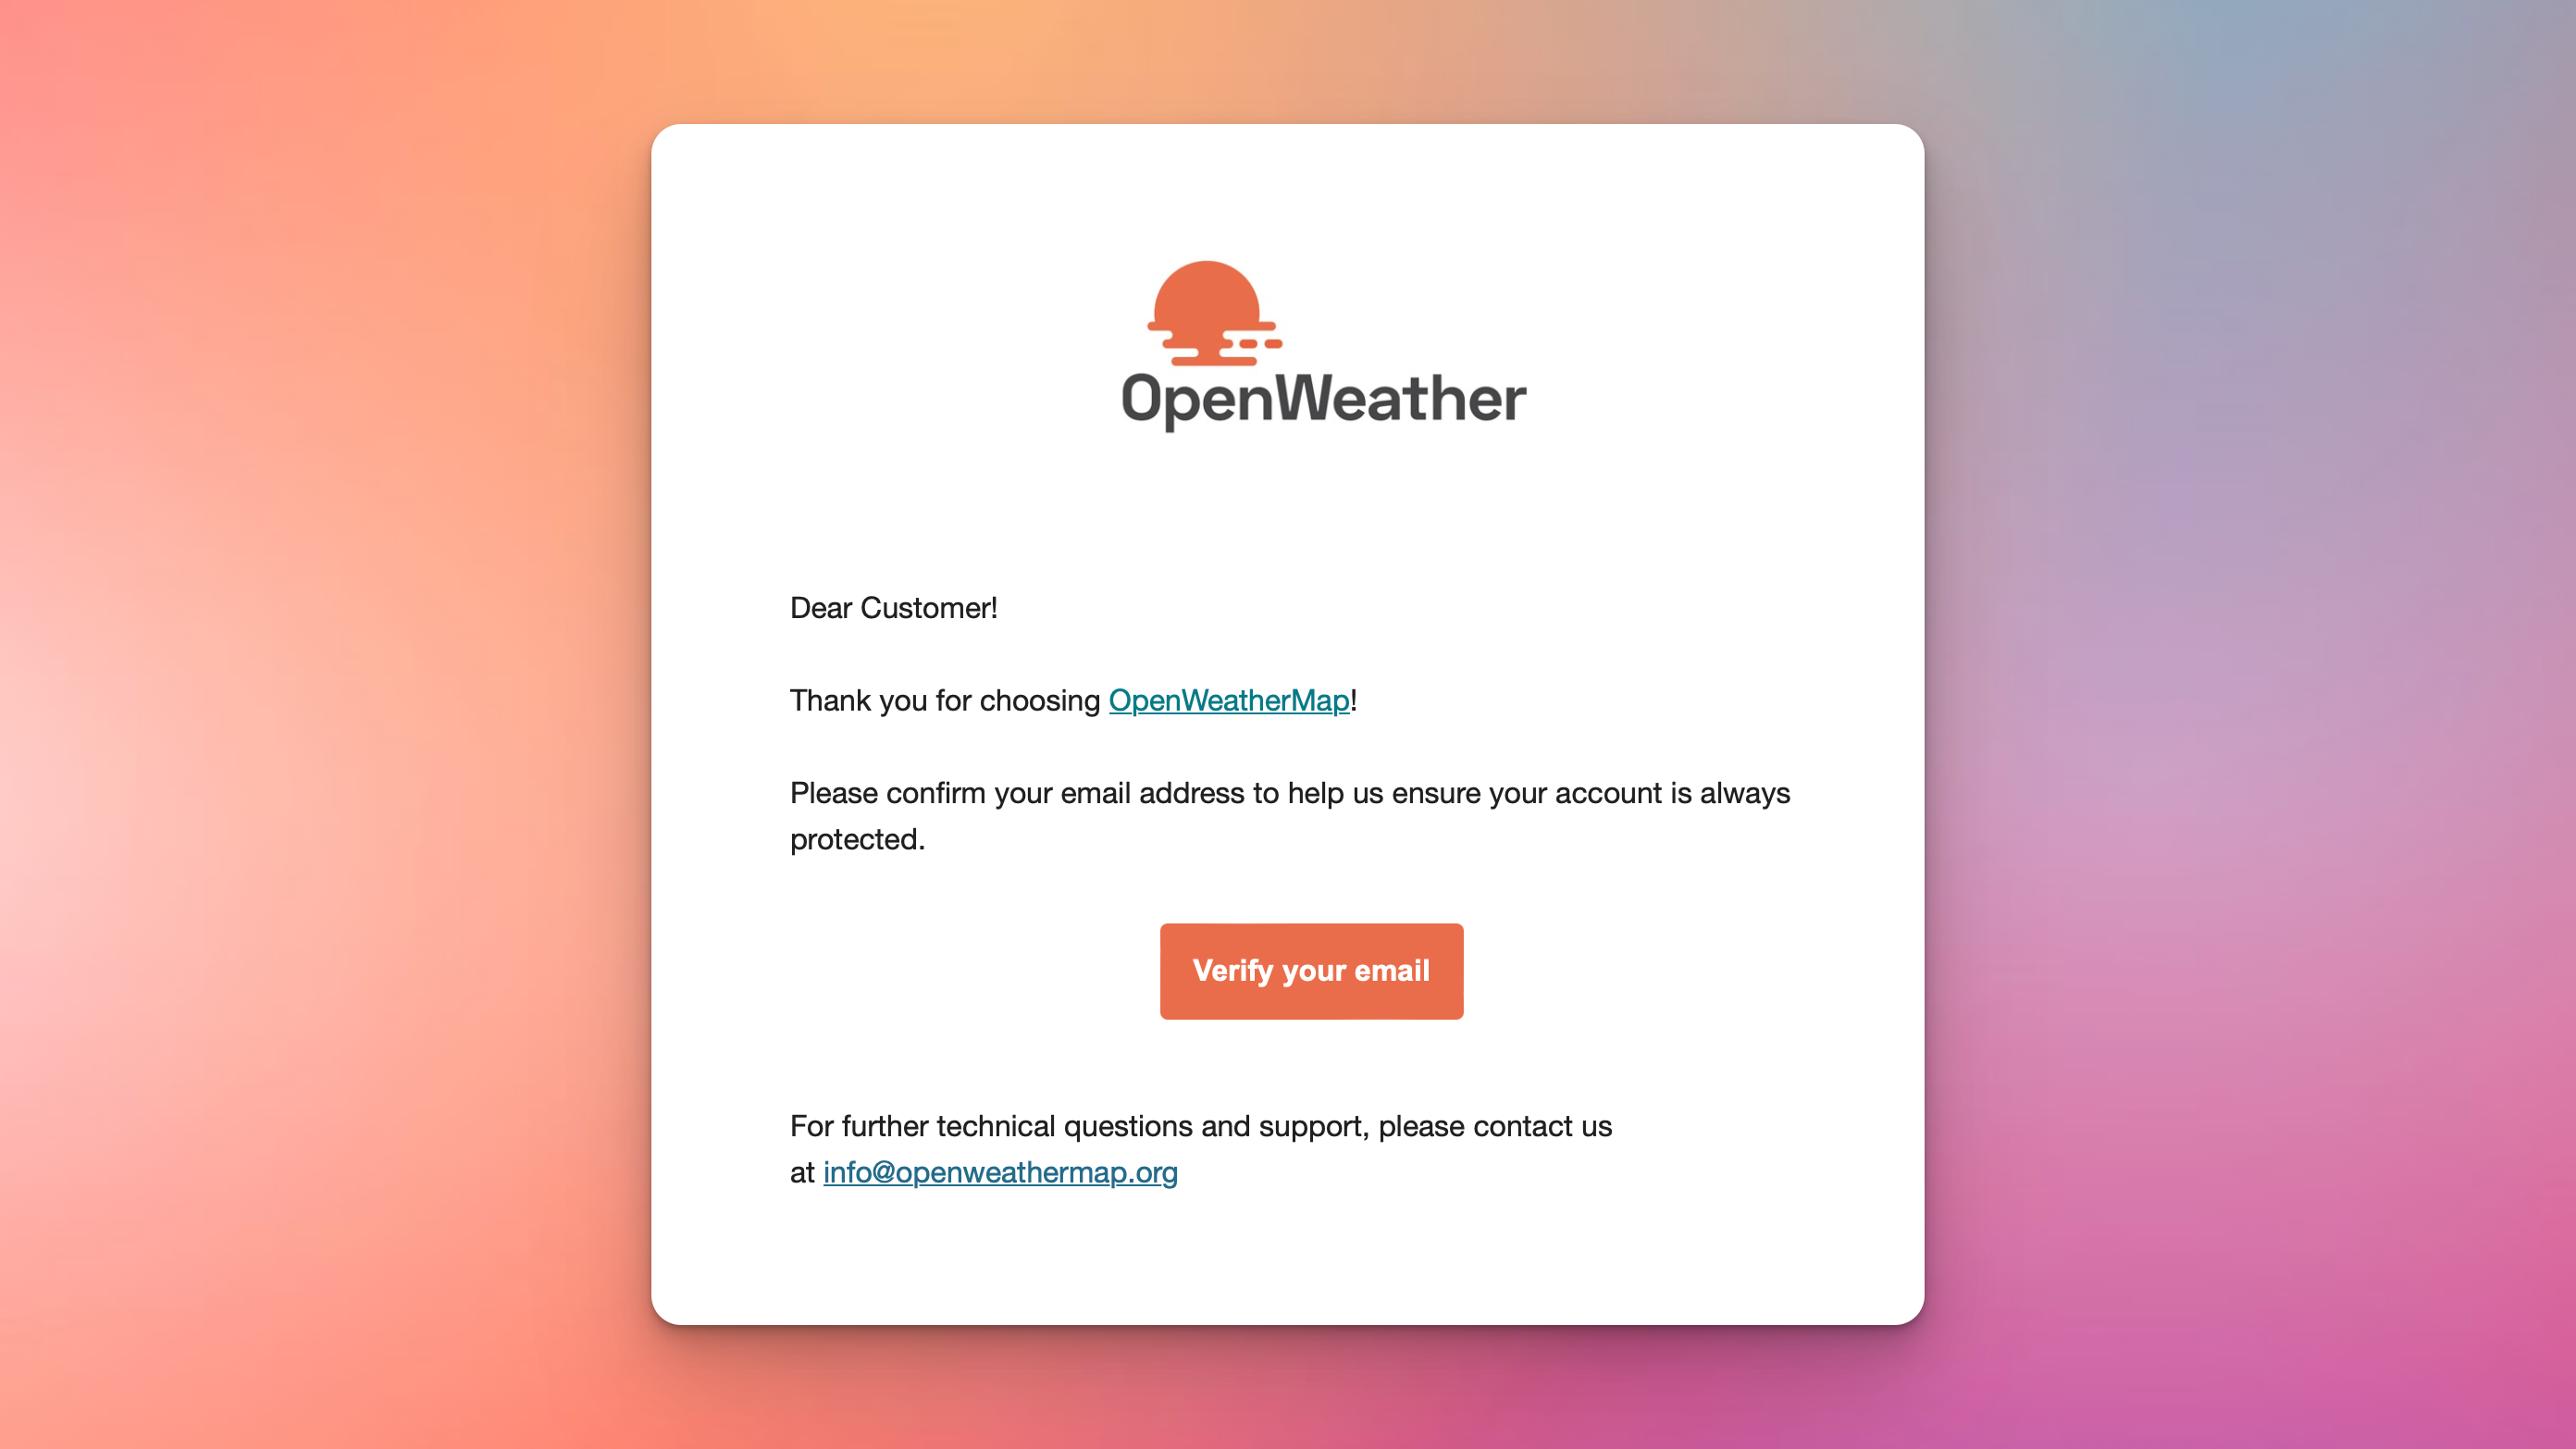
1. Create a free OpenWeather account

In order for our application to use real-time weather data for any location, we'll need a service that allows us to request weather information via an API.
For this project we'll use OpenWeather which I've found to be very developer-friendly and easy to get started with.
In my case, it took about 15 minutes for my account to be approved and ready for use, so do this step first!
2. Experiment with the OpenWeather API
Now that we've created our OpenWeather account, and cloned the project template, let's take a second to see what the OpenWeather API has to offer, and how we might be able to use it in our application.
When using a third-party service such as this, it's always best to determine if it will fit the project requirements in advance.
Reading the API docs
OpenWeather offers a robust suite of weather-related APIs for us to use, some free and some pair.
We'll be using their "Current weather data" API which is free to get started.
What data is available to us
The Current weather data API is available in both JSON and XML response formats. In our case, we'll be using JSON.
Let's take a look at the different fields that are returned from the JSON API, and what entail by viewing these links:
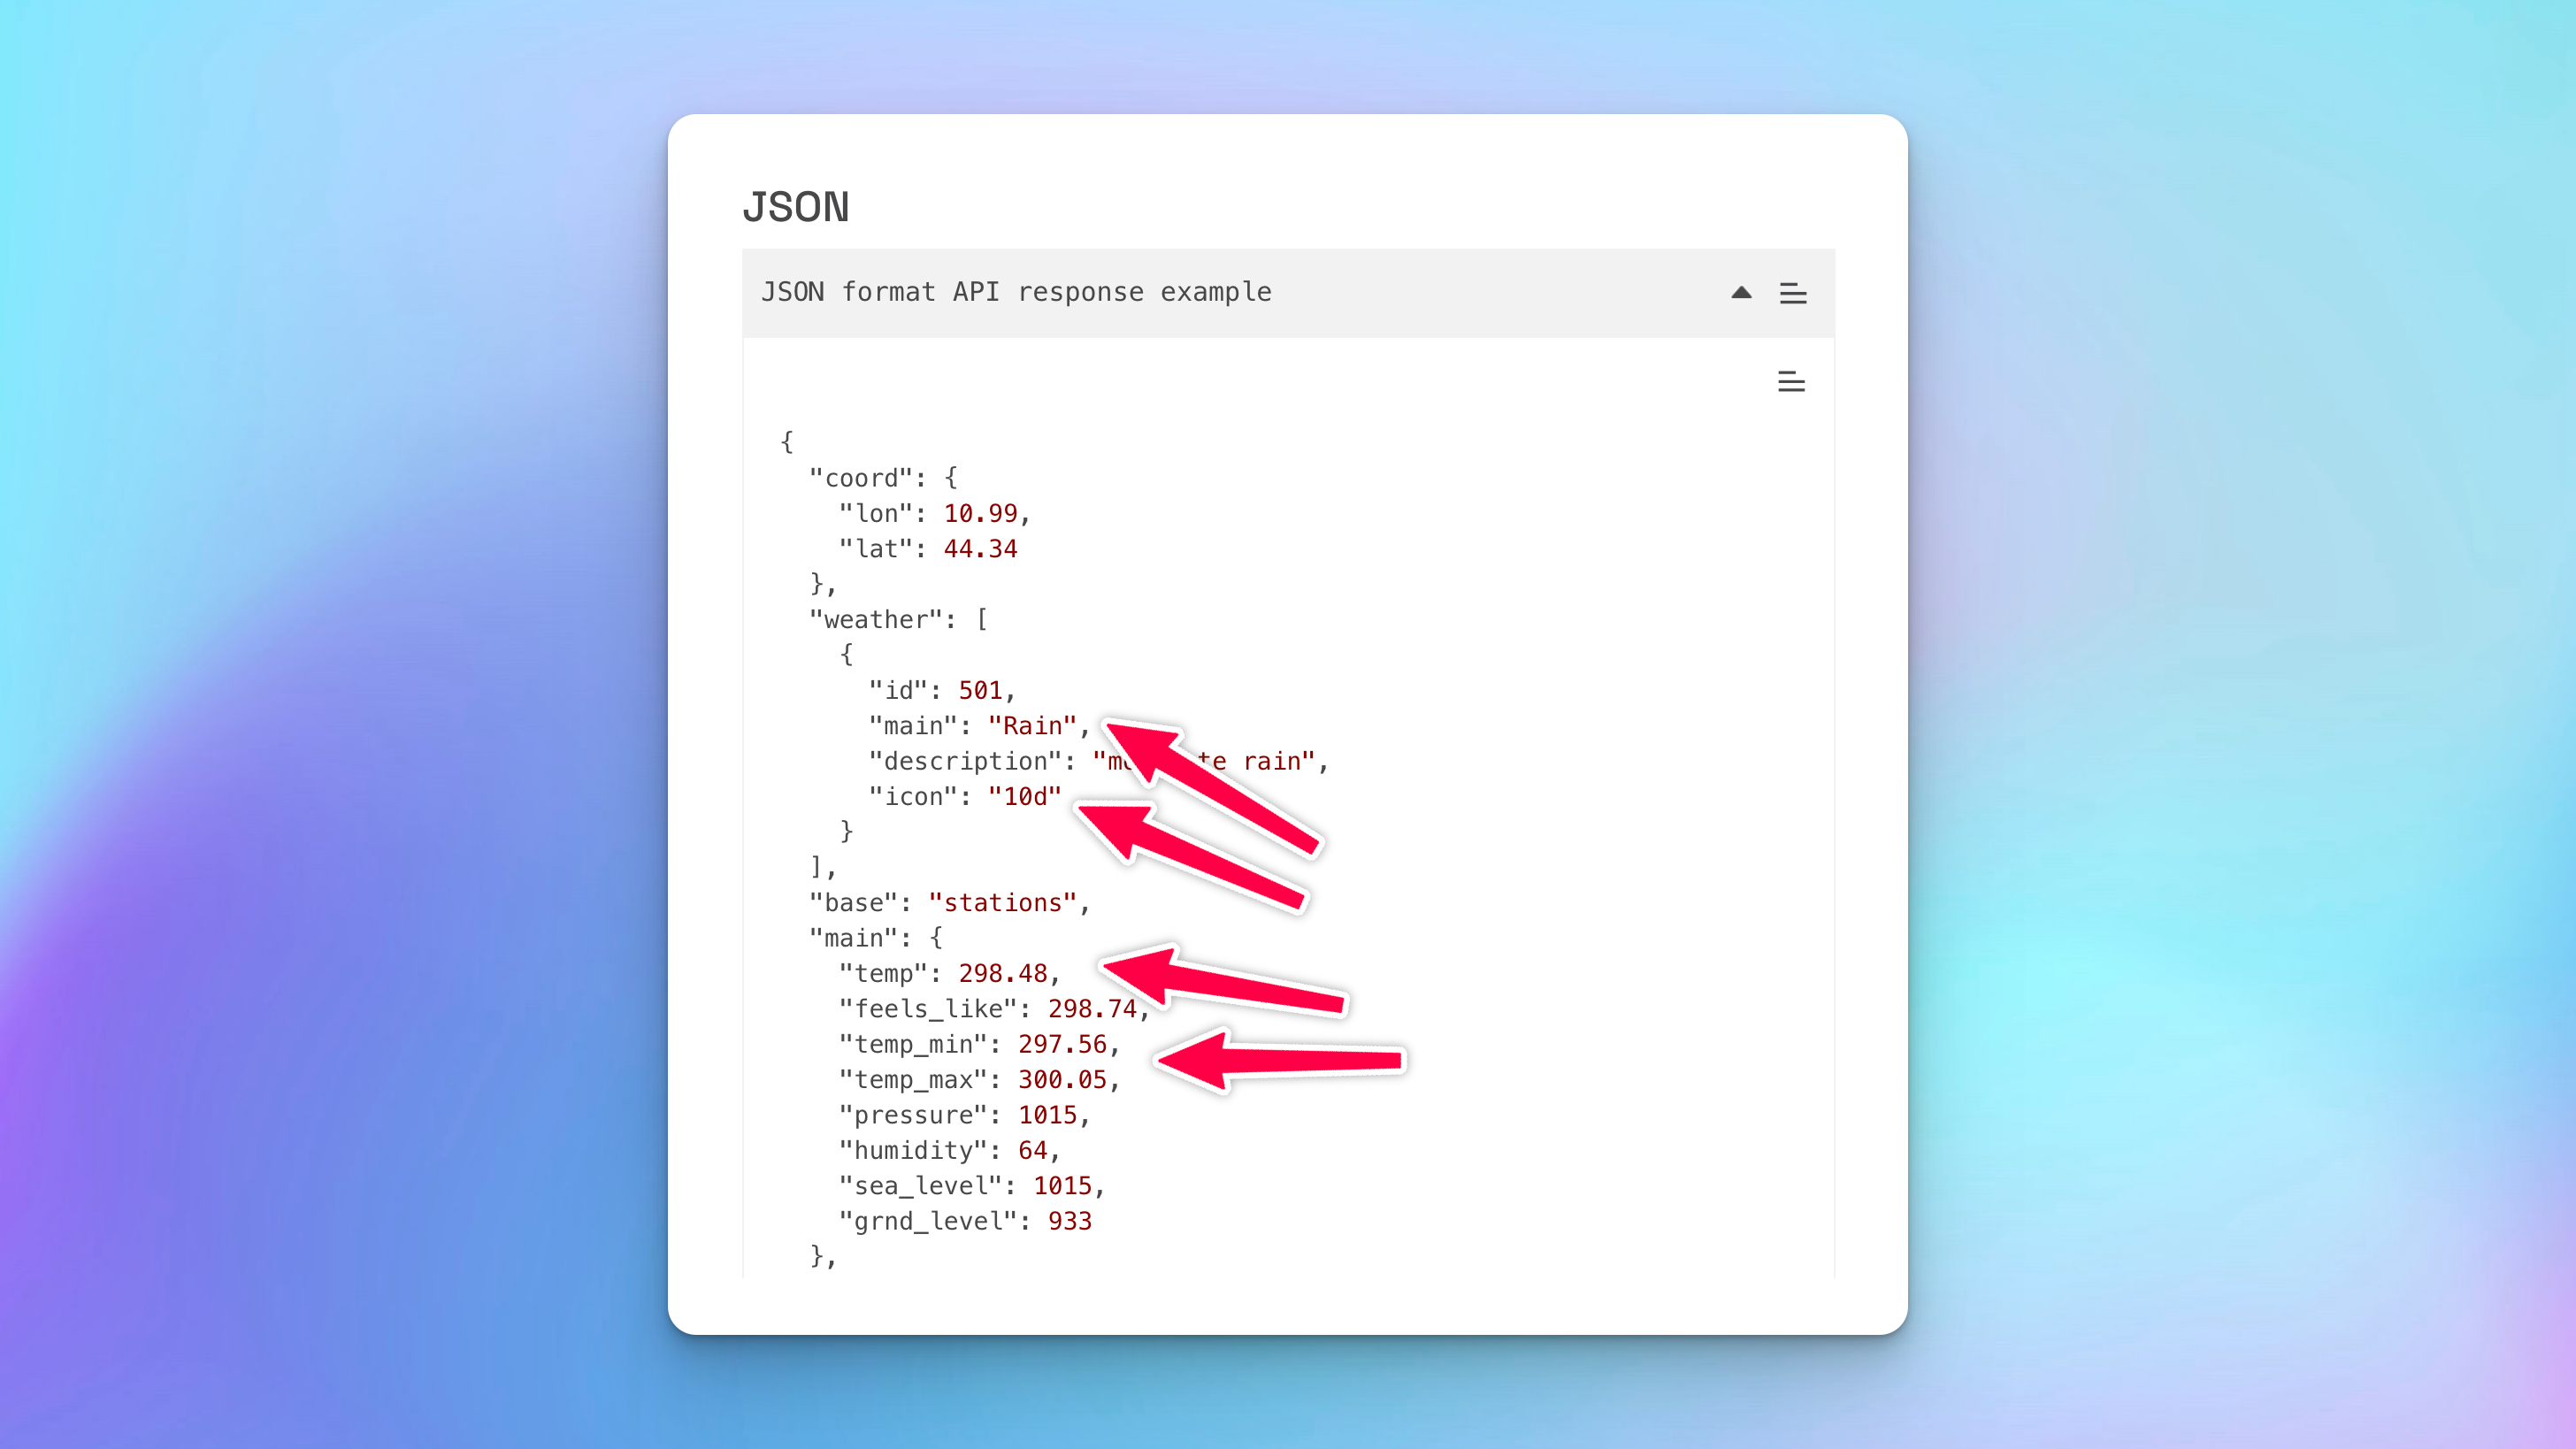
After examining the response data, it looks like this API will fulfill the requirements we've set forth, and we're able to extract the:
- Current, Min, and Max temperatures
- A description of the current weather e.g. "Rainy" or "Sunny"
- An eye-catching visual is provided by way of an icon name (
10din the screenshot) - The city name (not displayed in the screenshot below)
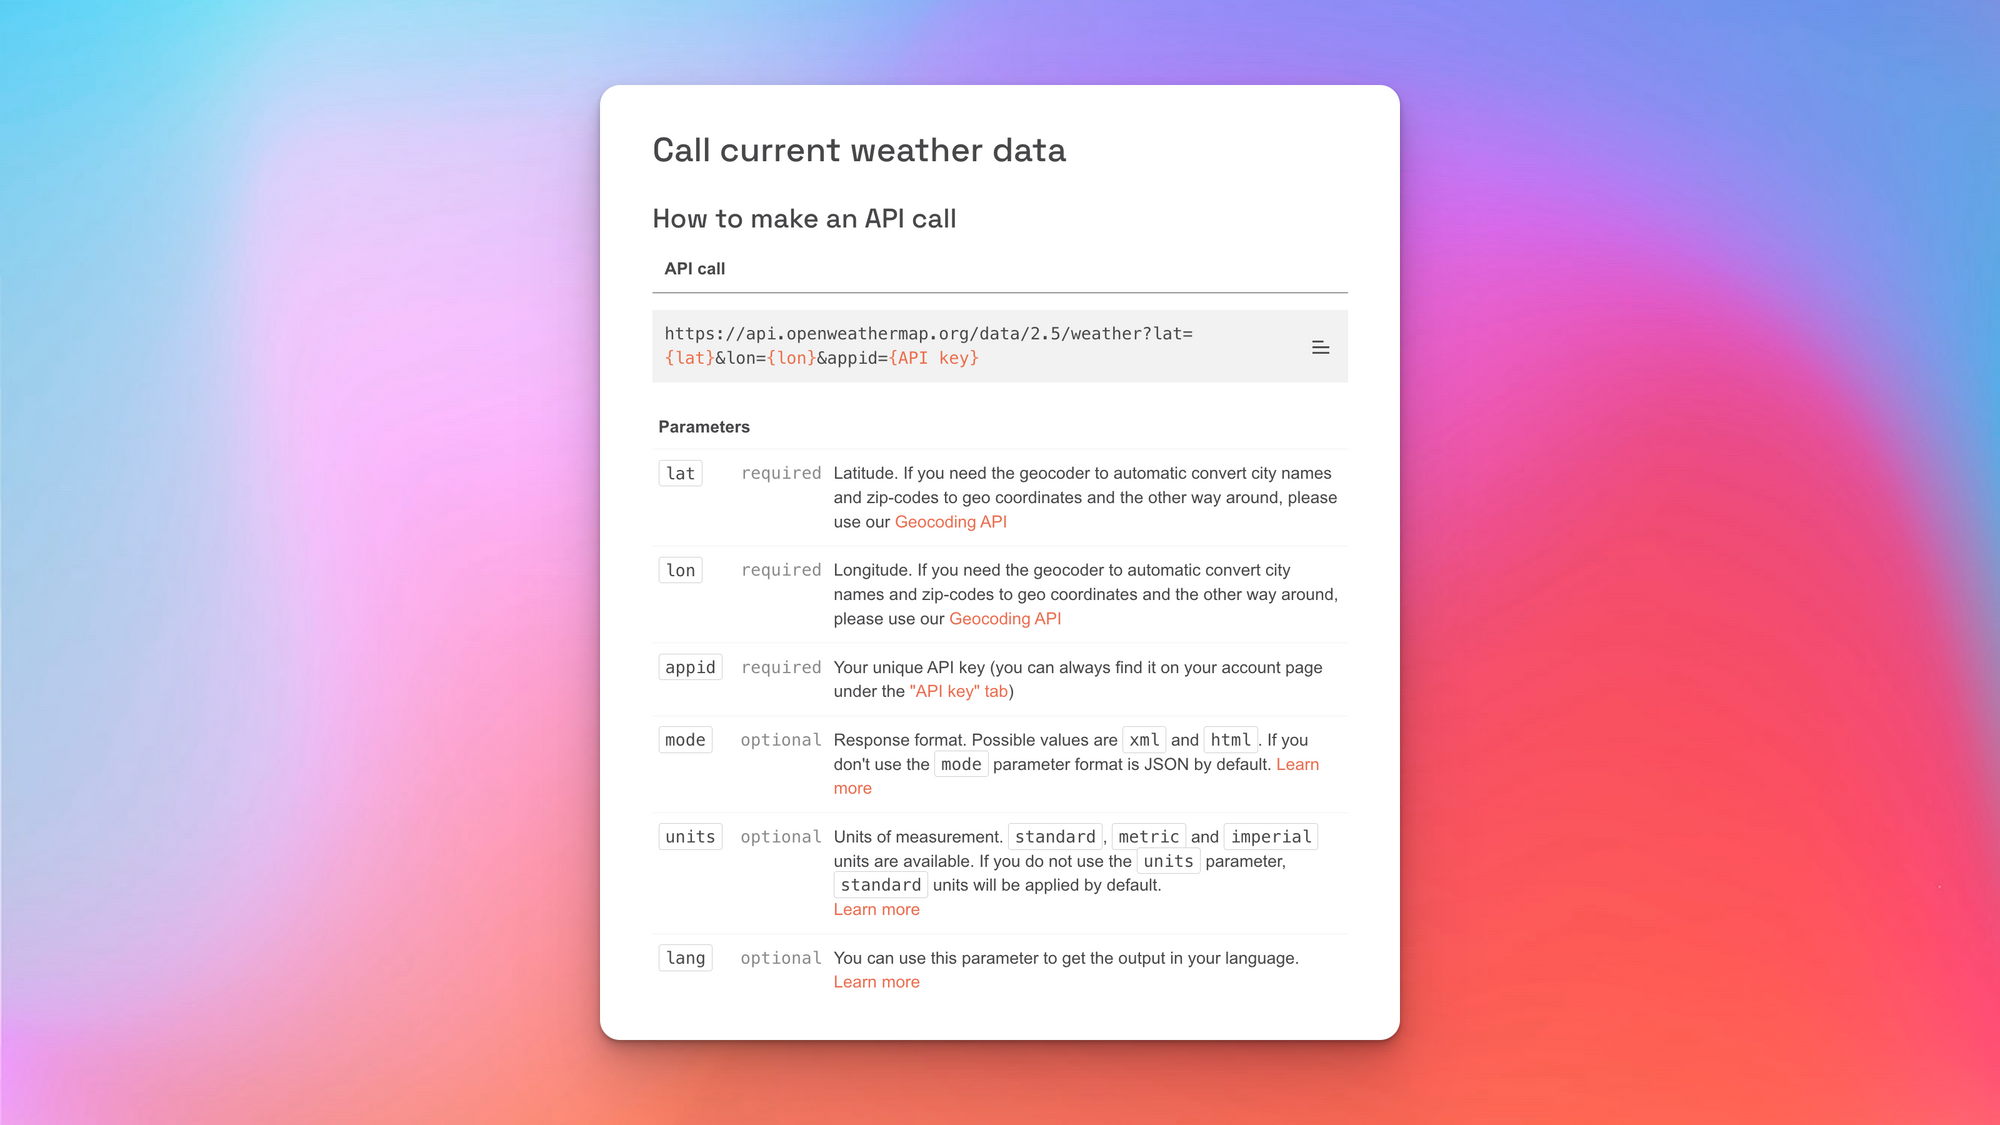
Request parameters
After reading through the docs, it's pretty straightforward to get started with this API.
The OpenWeather API endpoint to fetch the current weather data is:
https://api.openweathermap.org/data/2.5/weather?lat={lat}&lon={lon}&appid={API key}In order to fulfill our request for a given location, we need to pass in the required parameters:
lat: The latitude of the locationlon: The longitude of the locationappId: Our OpenWeather API key
We can optionally pass in a few other parameters such as mode, units, and lang to further customize the response data.
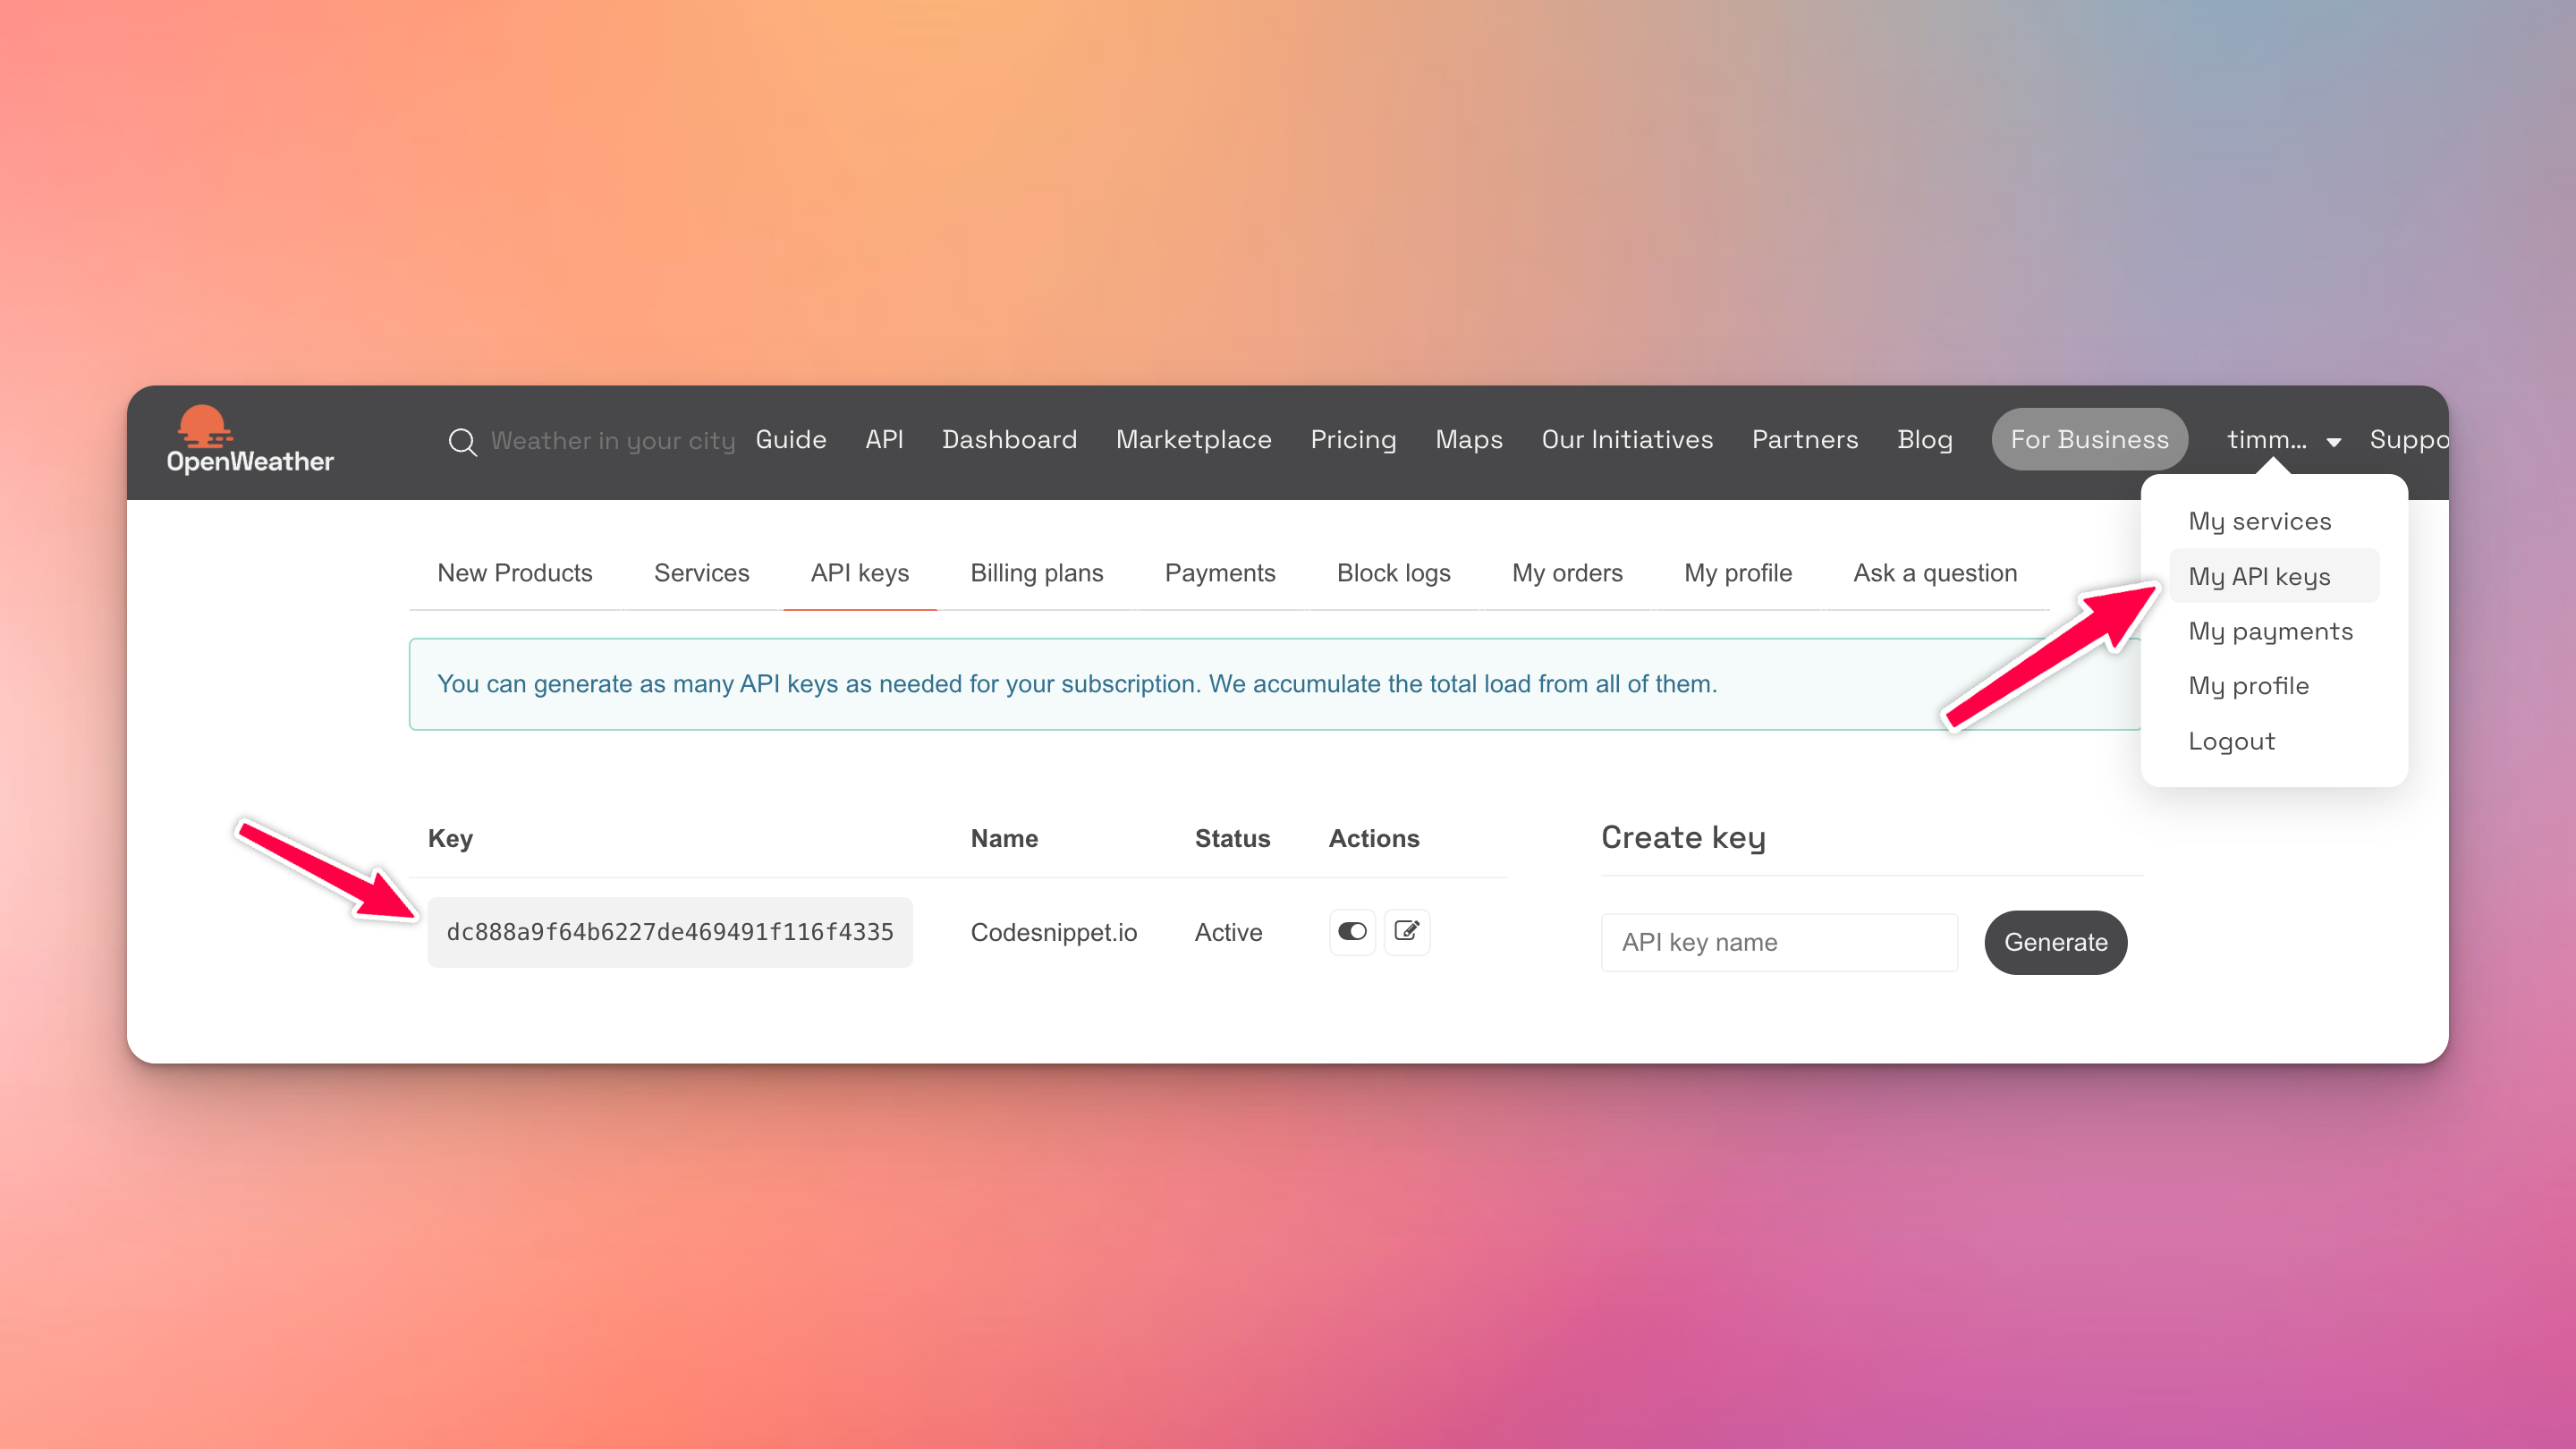
Getting your OpenWeather API Key
By now, your OpenWeather account should be ready to go, and we can begin experimenting with their API.
From the OpenWeather dashboard, let's grab our API key.
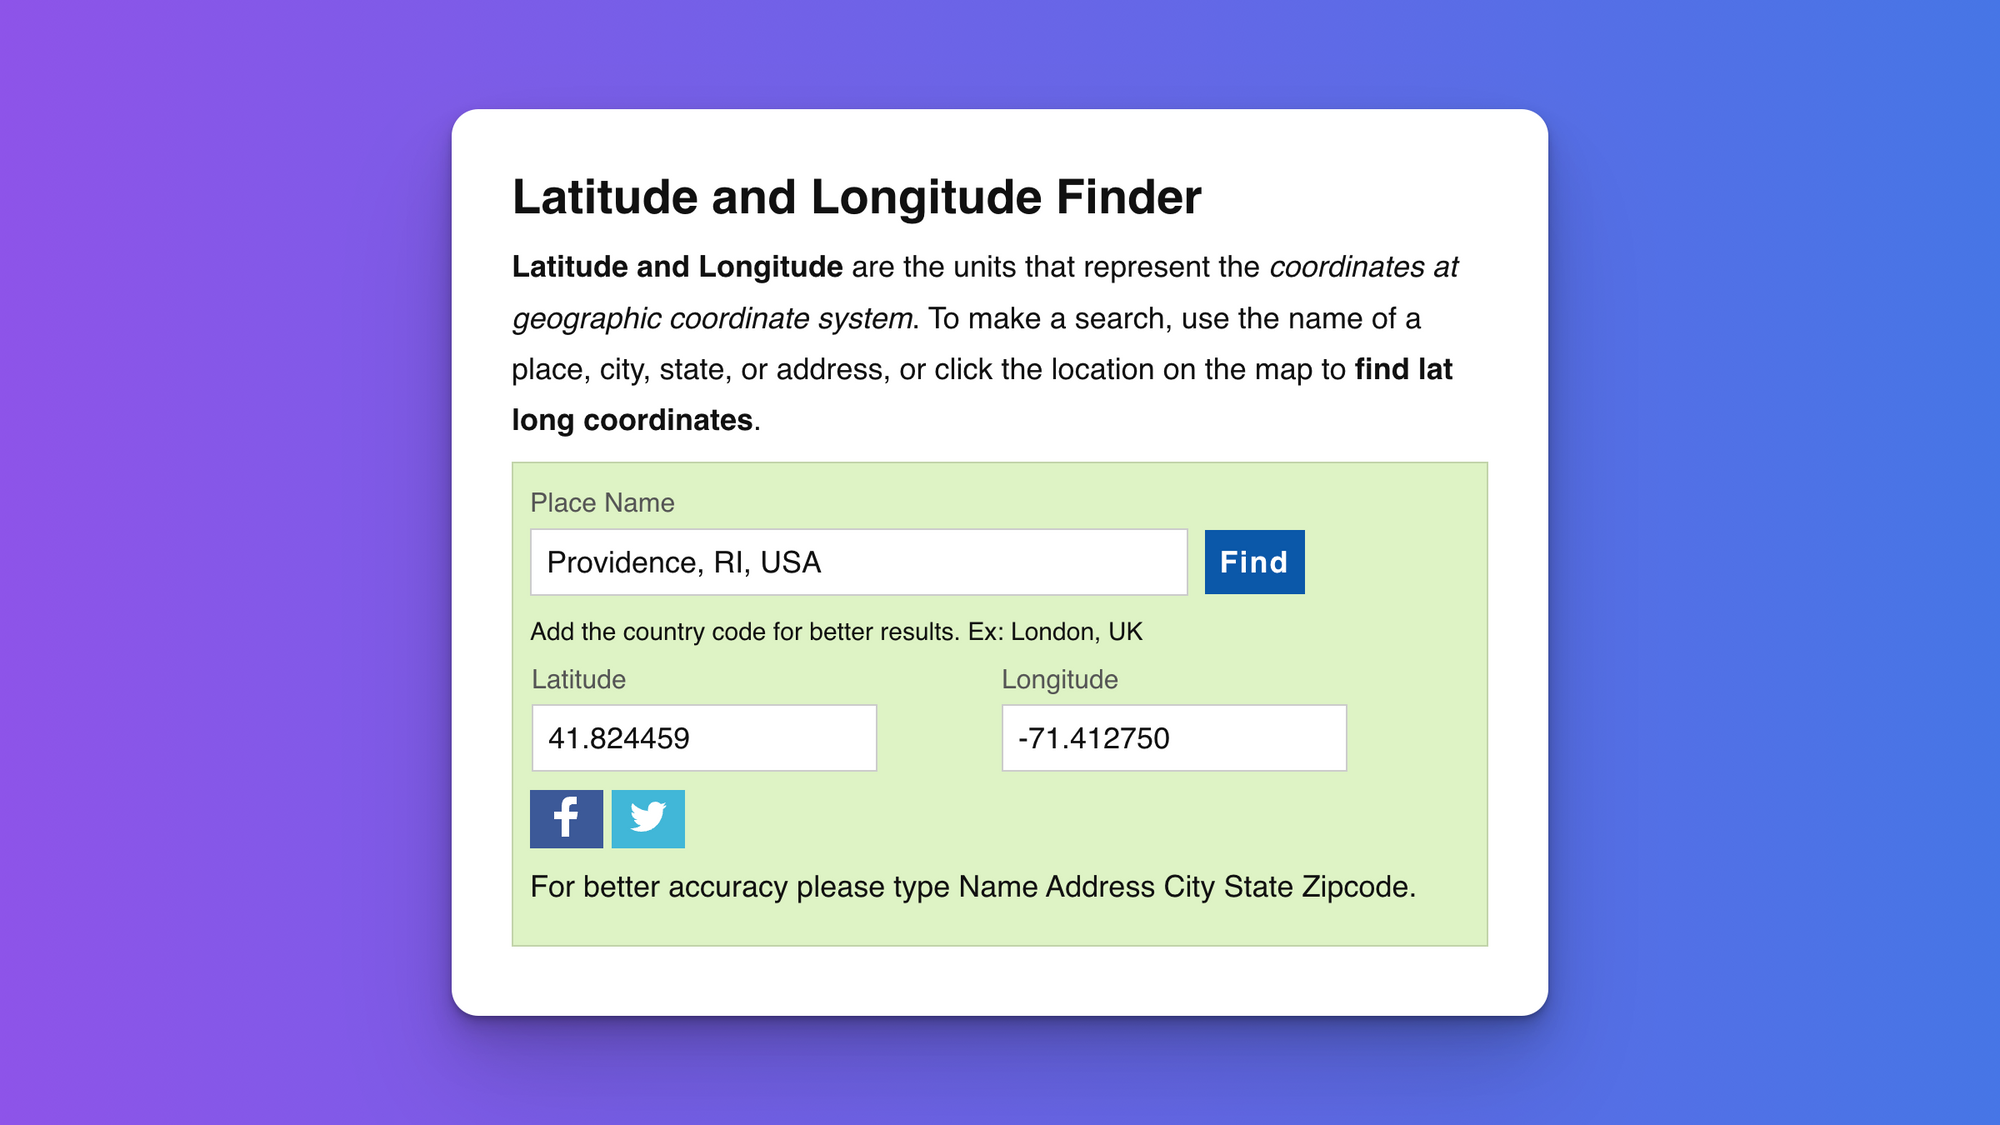
Getting some GPS coordinates
Now that we have our OpenWeather API key, the last thing we need are a set of GPS coordinates for some location in order to send our API request.
There are many ways to get GPS coordinates to test with. I used this tool that allowed me to enter a City, State, and Country for any location and it gave me the latitude and longitude that we need:
Sending an API request
Now that we have the latitude and longitude for a location, and our API key, let's fire off a request using our REST client.
I typically use Insomnia but you can use whatever you prefer. Other common tools such as curl or Postman will do the trick.
Let's use this API endpoint example from the OpenWeather docs, and plug in the values with the latitude, longitude, and your API key accordingly:
// original
https://api.openweathermap.org/data/2.5/weather?lat={lat}&lon={lon}&appid={API key}

// updated example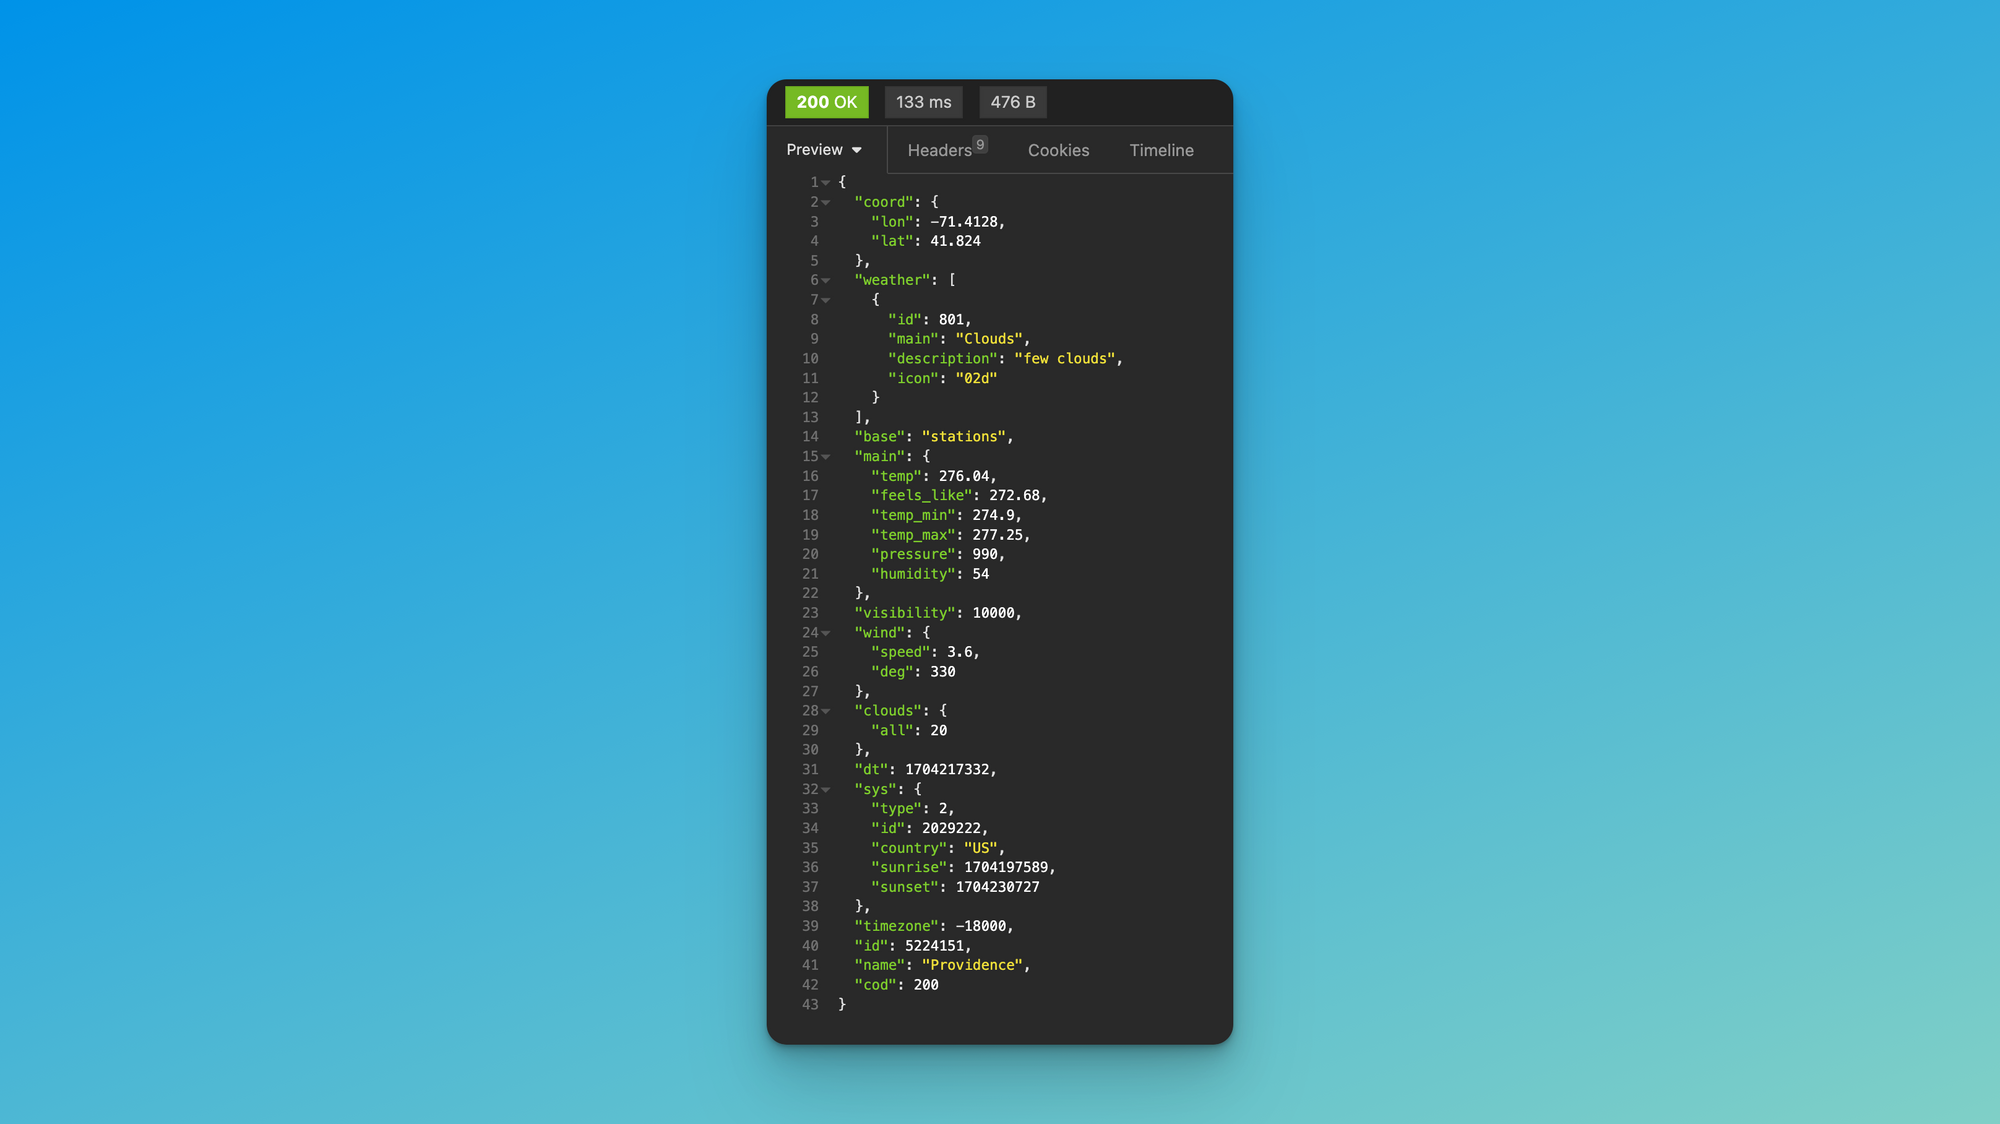
https://api.openweathermap.org/data/2.5/weather?lat=41.824459&lon=-71.412750&appid=dc888a9f64b6227de469491f116f4335Next up, paste the URL with the newly added values into your REST client and fire away!

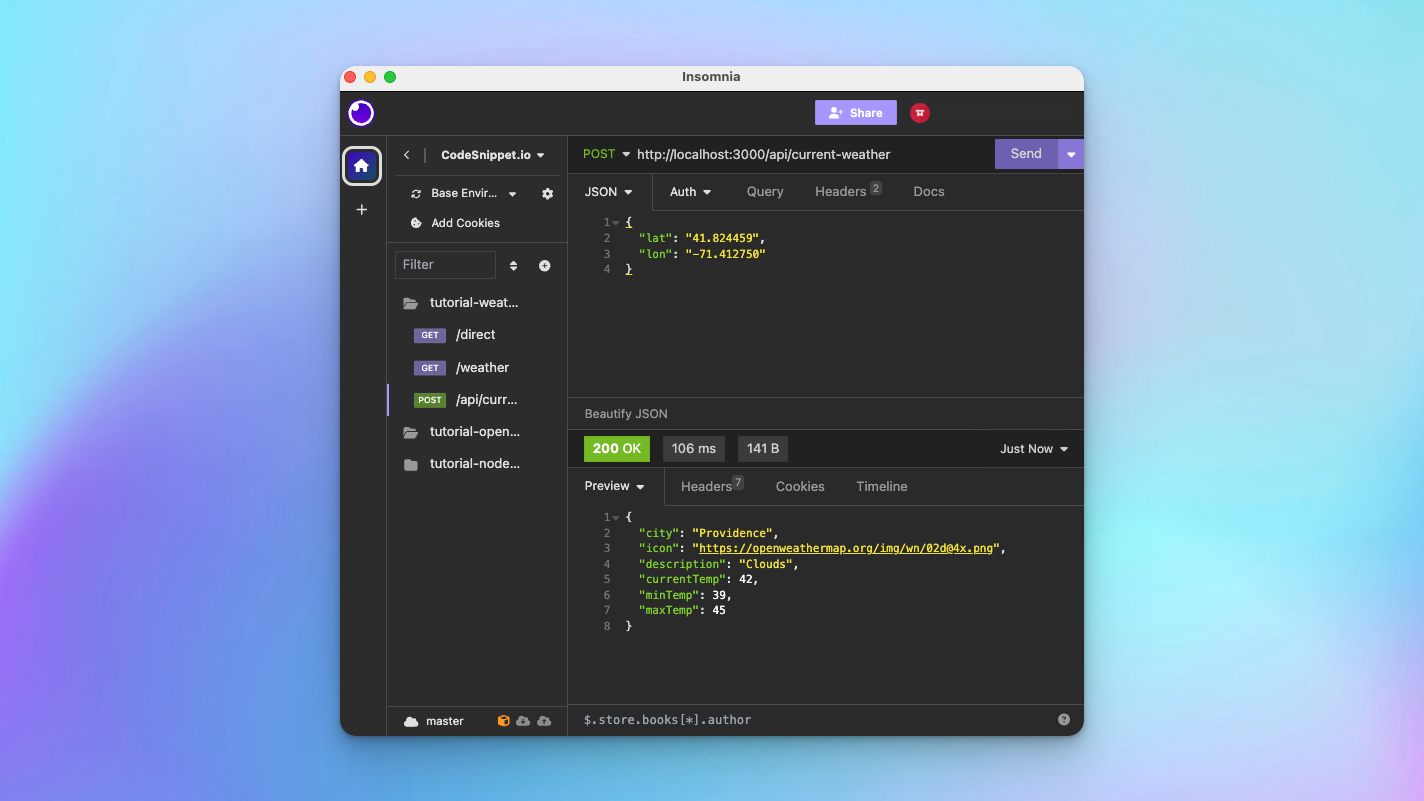
If everything went well, you should see a JSON response with a bunch of current weather data for the location you provided!
Take a close look at where the data is located in the response. We'll need to access this data later on.
Let's write some code 👨💻
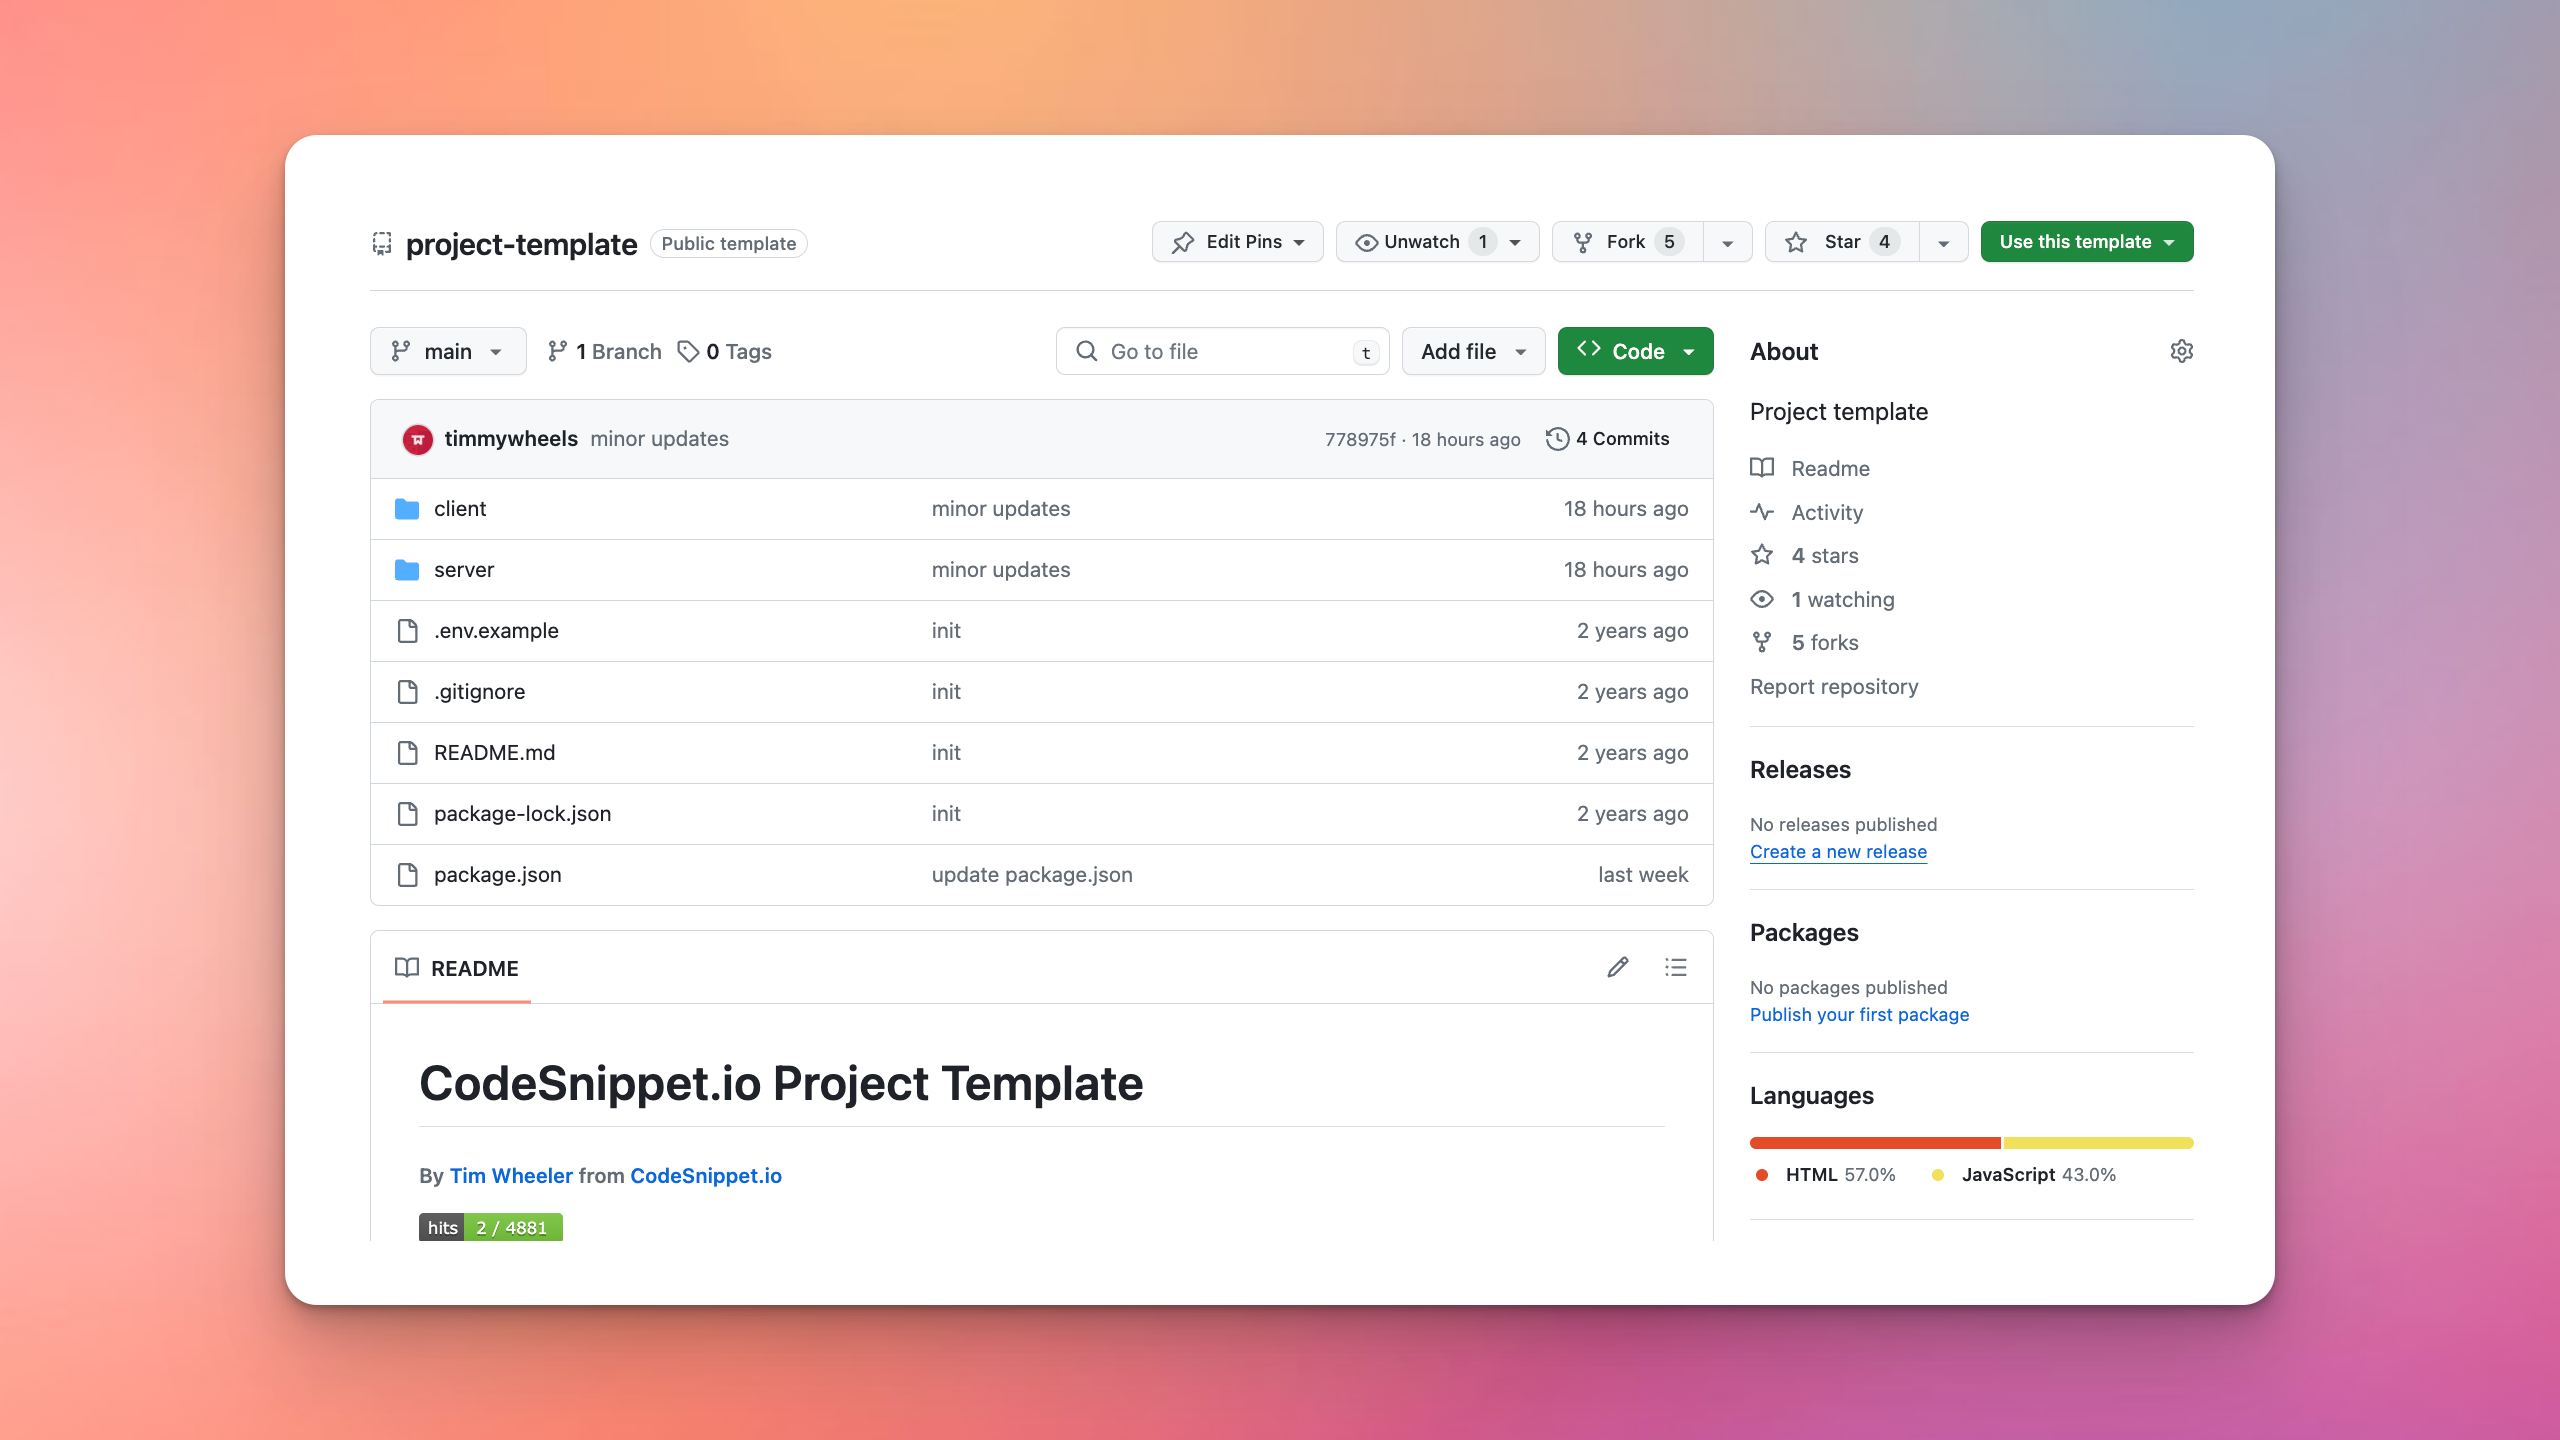
3. Clone the project template
As with most of our projects, we'll start with our handy project template. Use the link below to clone it to your machine, then open the project in your code editor, install the project dependencies via npm install and then run the boilerplate via npm run dev so we can get started!
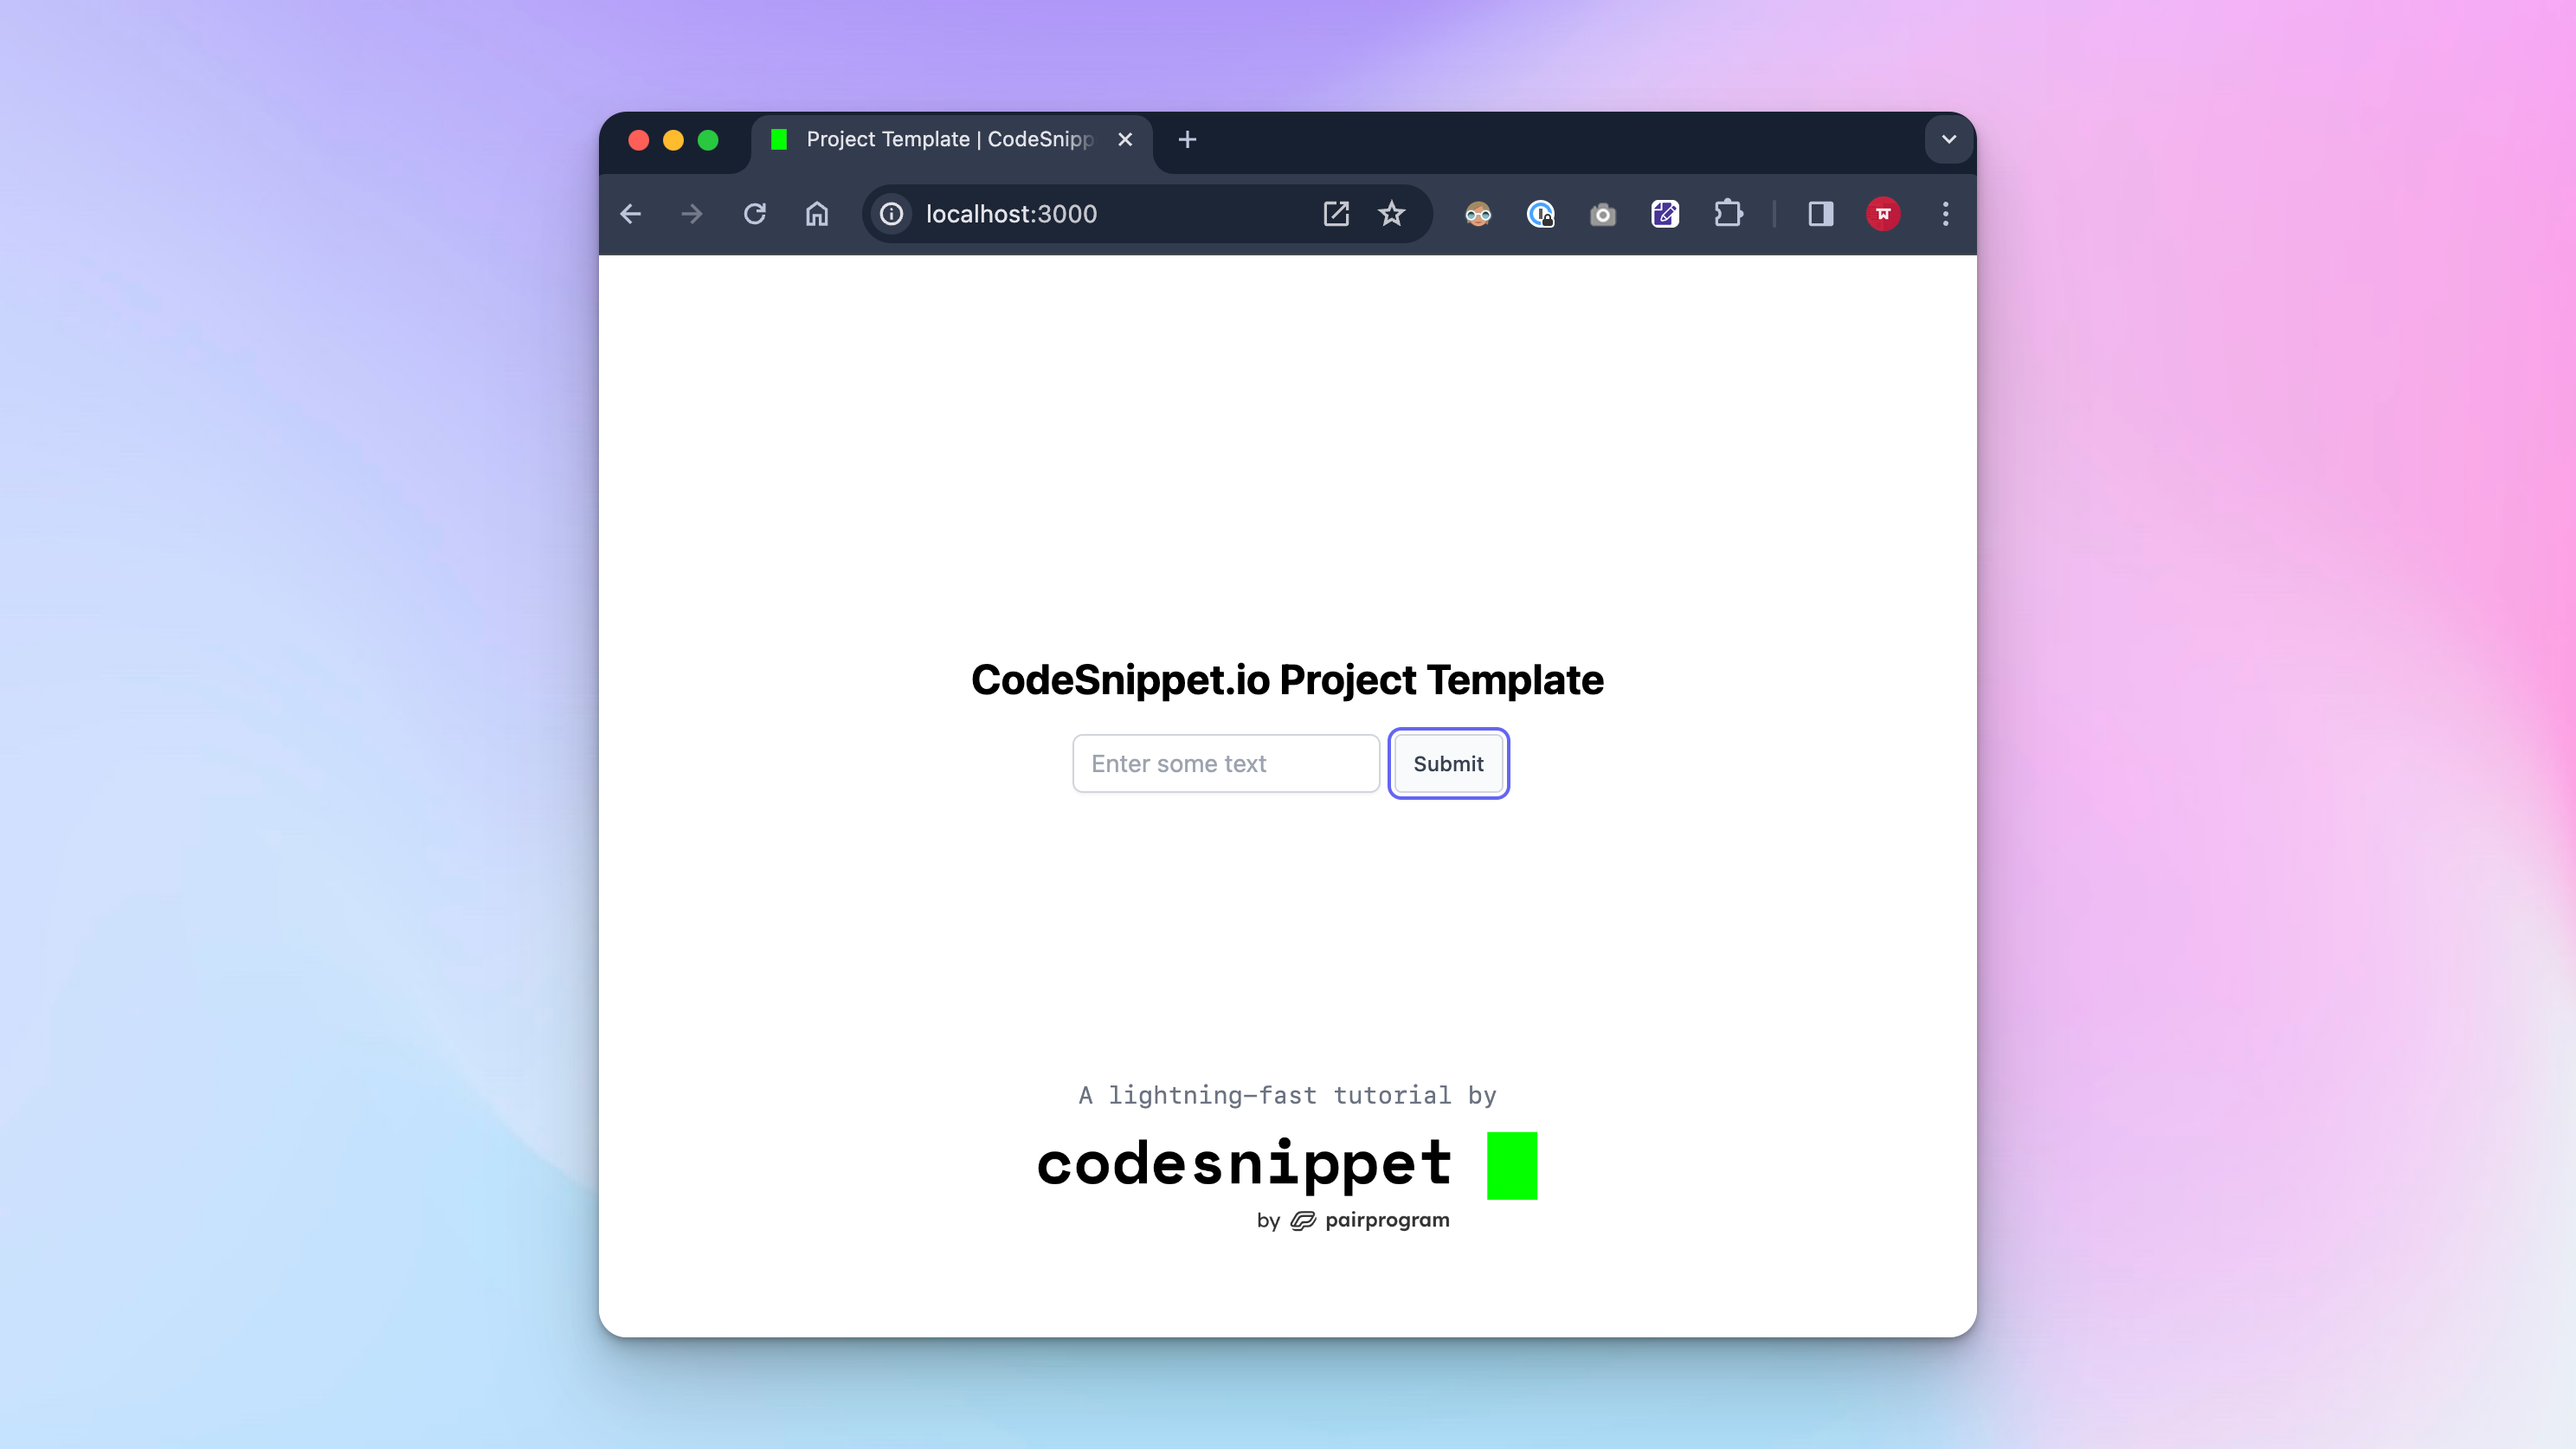
Now with the project template running, visit http://localhost:3000 in your web browser and you should see this boilerplate:
4. Wiring up the backend
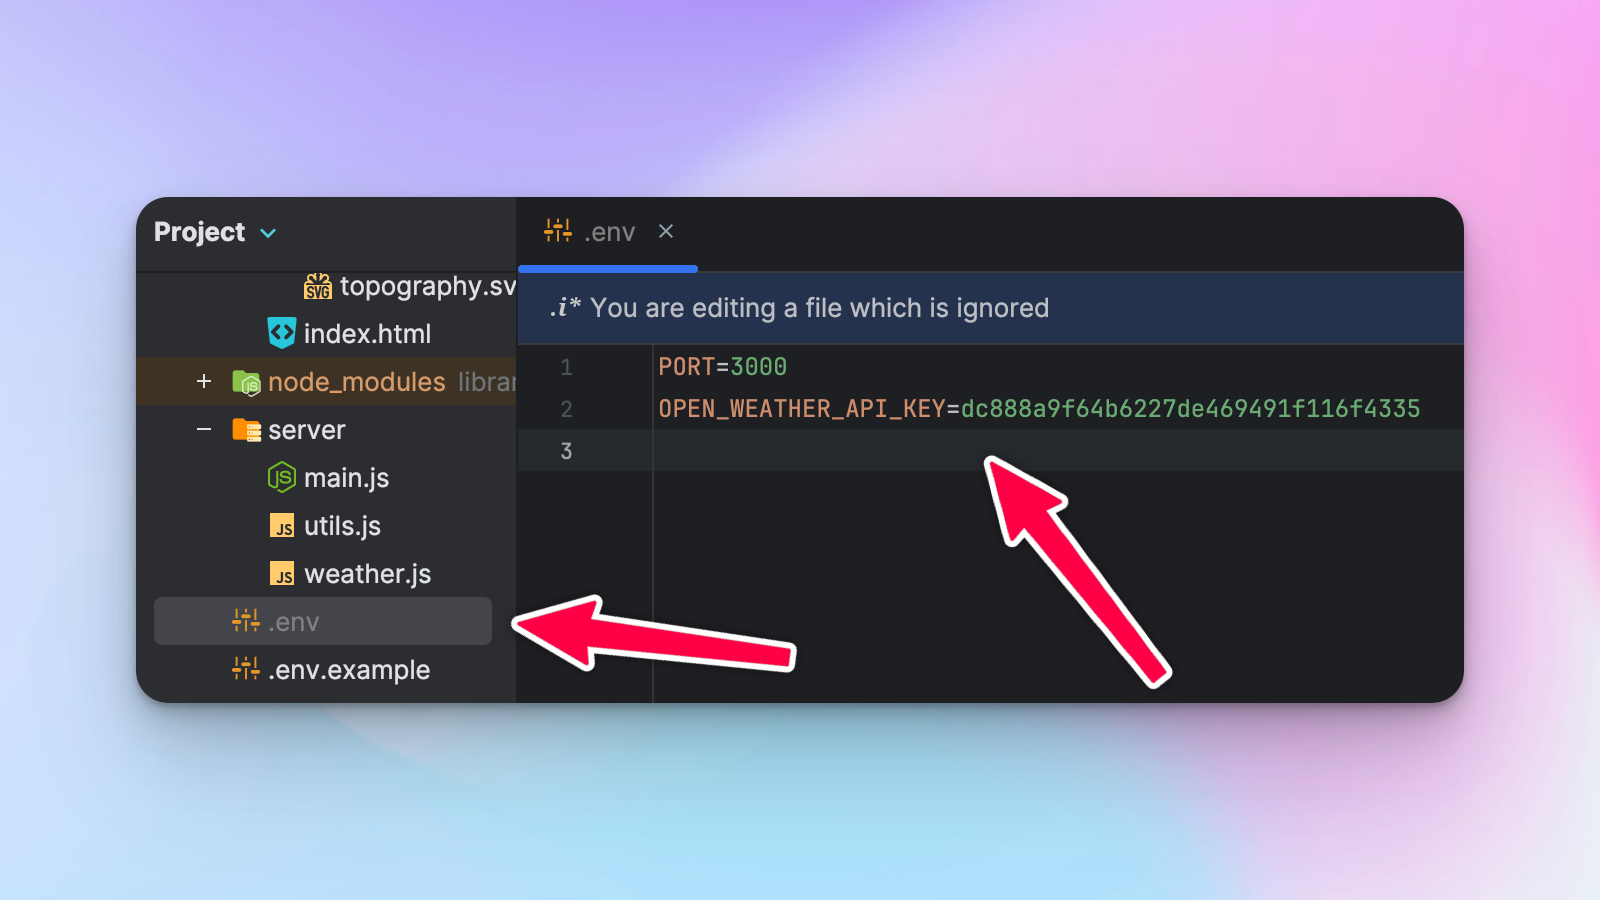
Adding our API key to a .env file
Using a .env file is standard practice so that API keys and other important secrets that should not be exposed publicly are kept safe.
From your terminal, in the root of the project, run cp .env.example .env.
This makes a copy of .env.example and it names the copy .env.
This .env file is where we'll keep our API key safe. Our application will read from this file whenever it requires the API key to make a request.
To learn more about app configurations and .env files, this is a good read:
 Adam Wiggins
Adding business logic to fetch data from OpenWeather
In the server/ directory, let's create a new file, weather.js that will hold all of the business logic that will be responsible for fetching data from the third-party OpenWeather API, and returning it to our frontend.
Start by importing and initializing the dotenv library which will read from our .env file. This library is already pre-installed in the CodeSnippet.io project template.
import * as dotenv from "dotenv";

dotenv.config();

const OPEN_WEATHER_API_KEY = process.env.OPEN_WEATHER_API_KEY;
Next up, we'll add the core function, getCurrentWeather that request the data from OpenWeather's API.
Remember we took note of where the data was in the response object from the OpenWeather API? That will come in handy here, so refer back to it if needed to see exactly how we extracted the data in the code below.
import * as dotenv from "dotenv";

dotenv.config();

const OPEN_WEATHER_API_KEY = process.env.OPEN_WEATHER_API_KEY;

// accepts `lat` and `lon` as arguments
export async function getCurrentWeather(lat, lon) {

    // pass in `lat`, `lon`, and the `OPEN_WEATHER_API_KEY` into the
    // request to the openweather api
    const res = await fetch(`https://api.openweathermap.org/data/2.5/weather?lat=${lat}&lon=${lon}&units=imperial&appid=${OPEN_WEATHER_API_KEY}`);

    // parse the response as json
    const data = await res.json();

    // destructure the response data, returning an object
    // with the city, and icon url, a decription,
    // as well as current, min, and max temps
    return {
        city: data.name,
        icon: `https://openweathermap.org/img/wn/${data.weather[0].icon}@4x.png`,
        description: data.weather[0].description,
        currentTemp: Math.trunc(data.main.temp),
        minTemp: Math.trunc(data.main.temp_min),
        maxTemp: Math.trunc(data.main.temp_max),
    }
}
Updating the existing template endpoint
Next, let's update our existing example endpoint located in server/main.js so that it extracts the lat and lon fields from the incoming request, and calls the getCurrentWeather function we just created with those lat and lon parameters, then returns the weather data.
// update endpoint located in server/main.js

@@ -1,4 +1,12 @@
-app.post('/api/request', async (req, res) => {
-    const { text } = req.body;
-    res.json({ data: text });
+app.post('/api/current-weather', async (req, res) => {
+    const { lat, lon } = req.body;
+    const { city, icon, description, currentTemp, minTemp, maxTemp } = await getCurrentWeather(lat, lon);
+    return res.json({
+        city,
+        icon,
+        description,
+        currentTemp,
+        minTemp,
+        maxTemp,
+    });
 });
Confirming that our API works
Similar to how we experimented with the OpenWeather API directly, let's now use our REST client to test our API that we just wired up and make sure everything is working as expected.
Make sure you configure your REST client to send a POST request to http://localhost:3000/api/current-weather, with this JSON request body:
{
  "lat": "41.824459",
  "lon": "-71.412750"
}
5. Wiring up the frontend
With our backend now fetching data from a third-party, parsing through the and formatting it to our liking, let's go ahead and make use of this on the frontend of our application.
Updating client/index.html
In the interest of time (remember we only have an hour! 😌), I'll provide you with the updated HTML to add to client/index.html below:
@@ -1,14 +1,32 @@
 <!-- code goes below -->
     <main class="grow flex flex-col items-center justify-center">
-        <h1 class="text-center text-2xl mt-5 font-bold my-4">CodeSnippet.io Project Template</h1>
-        <section>
-            <form id="form" class="flex space-x-2">
-                <div>
-                    <label for="text" class="sr-only">Text</label>
-                    <input id="text" type="text" name="name" class="block w-full rounded-md border border-gray-300 px-2.5 py-1.5
 shadow-sm focus:border-indigo-500 focus:ring-indigo-500 sm:text-sm" placeholder="Enter some text">
+        <div class="bg-gradient-to-br from-red-500 via-purple-500 to-blue-500 rounded-lg p-1 w-full max-w-sm h-[32rem] shadow-xl
 hover:shadow-lg transition transition-shadow duration-600">
+            <div class="bg-white bg-opacity-90 backdrop-filter backdrop-blur h-full rounded-md">
+                <div class="h-full w-full" style="background-image: url('images/topography.svg')">
+                    <div class="flex w-full justify-center items-center h-full" id="loader">
+                        <img class="h-8 w-8" src="images/loading.svg">
+                    </div>
+                    <div id="container" class="hidden flex flex-col h-full justify-center space-y-8">
+                        <h1 id="city"
+                            class="text-xl font-semibold text-indigo-900 text-center tracking-wider uppercase"></h1>
+                        <div class="flex flex-col w-full items-center space-y-4">
+                            <div class="bg-gradient-to-br from-red-500 via-purple-500 to-blue-500 rounded-full p-1">
+                                <div class="w-fit outline outline-8 outline-indigo-100/50 rounded-full bg-white">
+                                    <img id="icon" class="h-32 w-32 mx-auto" src="" alt="Weather Icon">
+                                </div>
+                            </div>
+                            <h2 id="description"
+                                class="text-sm font-light text-indigo-500/70 text-center tracking-widest uppercase"></h2>
+                        </div>
+                        <h3 id="currentTemp" class="text-7xl font-bold text-center text-indigo-900"></h3>
+                        <div class="flex justify-center space-x-2 font-normal text-xs text-indigo-800/70 tracking-wide">
+                            <h3 id="minTemp"></h3>
+                            <span>/</span>
+                            <h3 id="maxTemp"></h3>
+                        </div>
+                    </div>
                 </div>
-                <button type="submit" class="inline-flex items-center rounded border border-gray-300 bg-white px-2.5 py-1.5 text
-xs font-medium text-gray-700 shadow-sm hover:bg-gray-50 focus:outline-none focus:ring-2 focus:ring-indigo-500 focus:ring-offset-
2">Submit</button>
-            </form>
-        </section>
+            </div>
+        </div>
     </main>
     <!-- code goes above-->
And since it's easier than parsing the diff, here's the exact code snippet to paste in between the comments in client/index.html.
<!-- code goes below -->
<main class="grow flex flex-col items-center justify-center">
        <div class="bg-gradient-to-br from-red-500 via-purple-500 to-blue-500 rounded-lg p-1 w-full max-w-sm h-[32rem] shadow-xl hover:shadow-lg transition transition-shadow duration-600">
            <div class="bg-white bg-opacity-90 backdrop-filter backdrop-blur h-full rounded-md">
                <div class="h-full w-full" style="background-image: url('images/topography.svg')">
                    <div class="flex w-full justify-center items-center h-full" id="loader">
                        <img class="h-8 w-8" src="images/loading.svg">
                    </div>
                    <div id="container" class="hidden flex flex-col h-full justify-center space-y-8">
                        <h1 id="city"
                            class="text-xl font-semibold text-indigo-900 text-center tracking-wider uppercase"></h1>
                        <div class="flex flex-col w-full items-center space-y-4">
                            <div class="bg-gradient-to-br from-red-500 via-purple-500 to-blue-500 rounded-full p-1">
                                <div class="w-fit outline outline-8 outline-indigo-100/50 rounded-full bg-white">
                                    <img id="icon" class="h-32 w-32 mx-auto" src="" alt="Weather Icon">
                                </div>
                            </div>
                            <h2 id="description"
                                class="text-sm font-light text-indigo-500/70 text-center tracking-widest uppercase"></h2>
                        </div>
                        <h3 id="currentTemp" class="text-7xl font-bold text-center text-indigo-900"></h3>
                        <div class="flex justify-center space-x-2 font-normal text-xs text-indigo-800/70 tracking-wide">
                            <h3 id="minTemp"></h3>
                            <span>/</span>
                            <h3 id="maxTemp"></h3>
                        </div>
                    </div>
                </div>
            </div>
        </div>
    </main>
<!-- code goes above-->
Small tweak to the loader
In the project template, I've included a sweet SVG loader from this project that I've been using for years, located at client/images/loading.svg
We need to make a very minor tweak so that the loader for our app looks a bit nicer on our new frontend.
Open up client/images/loading.svg and change fill="#fff" to fill="#6366f1" which will give it a nice purple color that's a little easier to see.
@@ -1,5 +1,5 @@
 <!-- By Sam Herbert (@sherb), for everyone. More @ http://goo.gl/7AJzbL -->
-<svg width="120" height="30" viewBox="0 0 120 30" xmlns="http://www.w3.org/2000/svg" fill="#fff">
+<svg width="120" height="30" viewBox="0 0 120 30" xmlns="http://www.w3.org/2000/svg" fill="#6366f1">
     <circle cx="15" cy="15" r="15">
         <animate attributeName="r" from="15" to="15"
begin="0s" dur="0.8s"If you reload the app, we should now see the shell of our weather app starting to take shape!
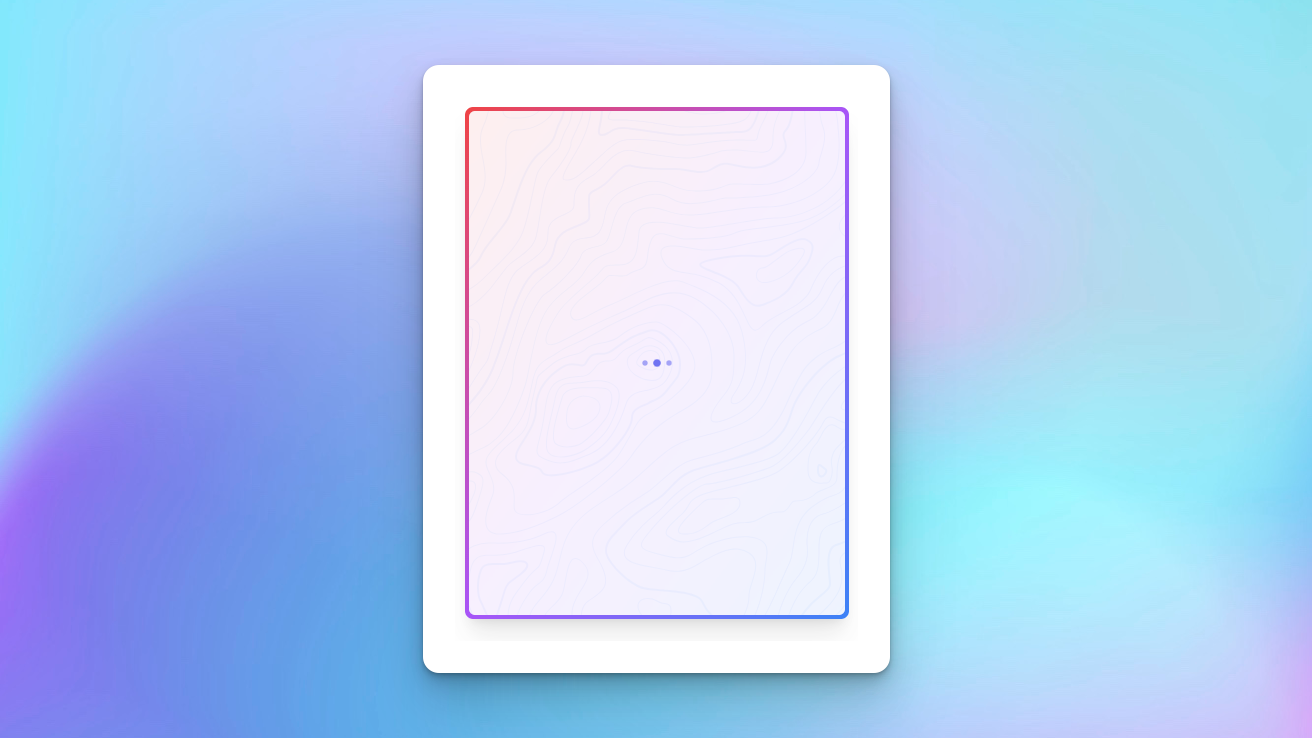
Displaying the weather data on the frontend
Updating client/app/index.js
Because we have a number of changes to make in this file, start by removing all the existing contents of client/app/index.js so we can start with a blank slate.
Getting the user's coordinates
Earlier we discussed the requirements of our application, pretty much all of which are centered around the user's location. Things like the city, the current/min/max temperatures for said city, etc.
Well as we built out our backend, we operated under the assumption that we would already have the user's location, or their current latitude and longitude for that matter.
In order to get the user's current latitude and longitude, we can make use of the Navigator.geolocation Web API which is supported by all major web browsers.
Navigator.geolocation Docs: https://developer.mozilla.org/en-US/docs/Web/API/Navigator/geolocationLucky for us, the Navigator.geolocation API has a method, getCurrentPosition() that allows us to access the approximate coordinates of the user – just what we need!
So back in client/app/index.js let's write some code to get those sweet sweet coordinates and send the request to our backend server.
function getLocation() {
// docs: https://developer.mozilla.org/en-US/docs/Web/API/Geolocation/getCurrentPosition
// check if geolocation features are available
if (navigator.geolocation) {
// prompt user to allow location access
navigator.geolocation.getCurrentPosition((position) => {
// extract the coordinates from the user's position
const { latitude, longitude } = position.coords;
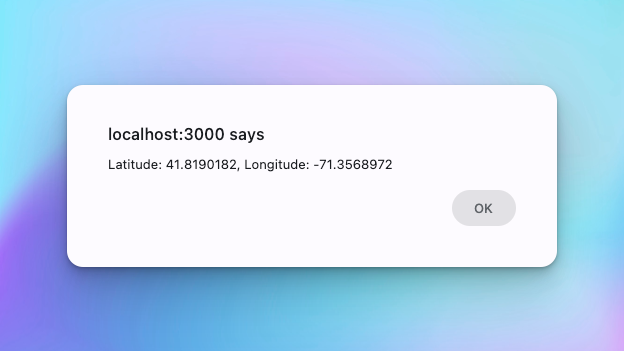
// display the user's coordinates
alert(`Latitude: ${latitude}, Longitude: ${longitude}`);
});
} else {
alert("Geolocation is not supported by this browser.");
}
}It's worth noting that your browser already has an instantiated Navigator object, so you don't have to manually instantiate it yourself.
Automatically prompt the user for their location
At the bottom of client/app/index.js, let's add one line of code that will automatically invoke the function we just created above, prompting the user for their location as soon as they load the app.
@@ -20,3 +20,5 @@ function getLocation() {
         alert("Geolocation is not supported by this browser.");
     }
 }
+
+window.onload = getLocation;
This essentially says that when the browser loads, call the getLocation function.
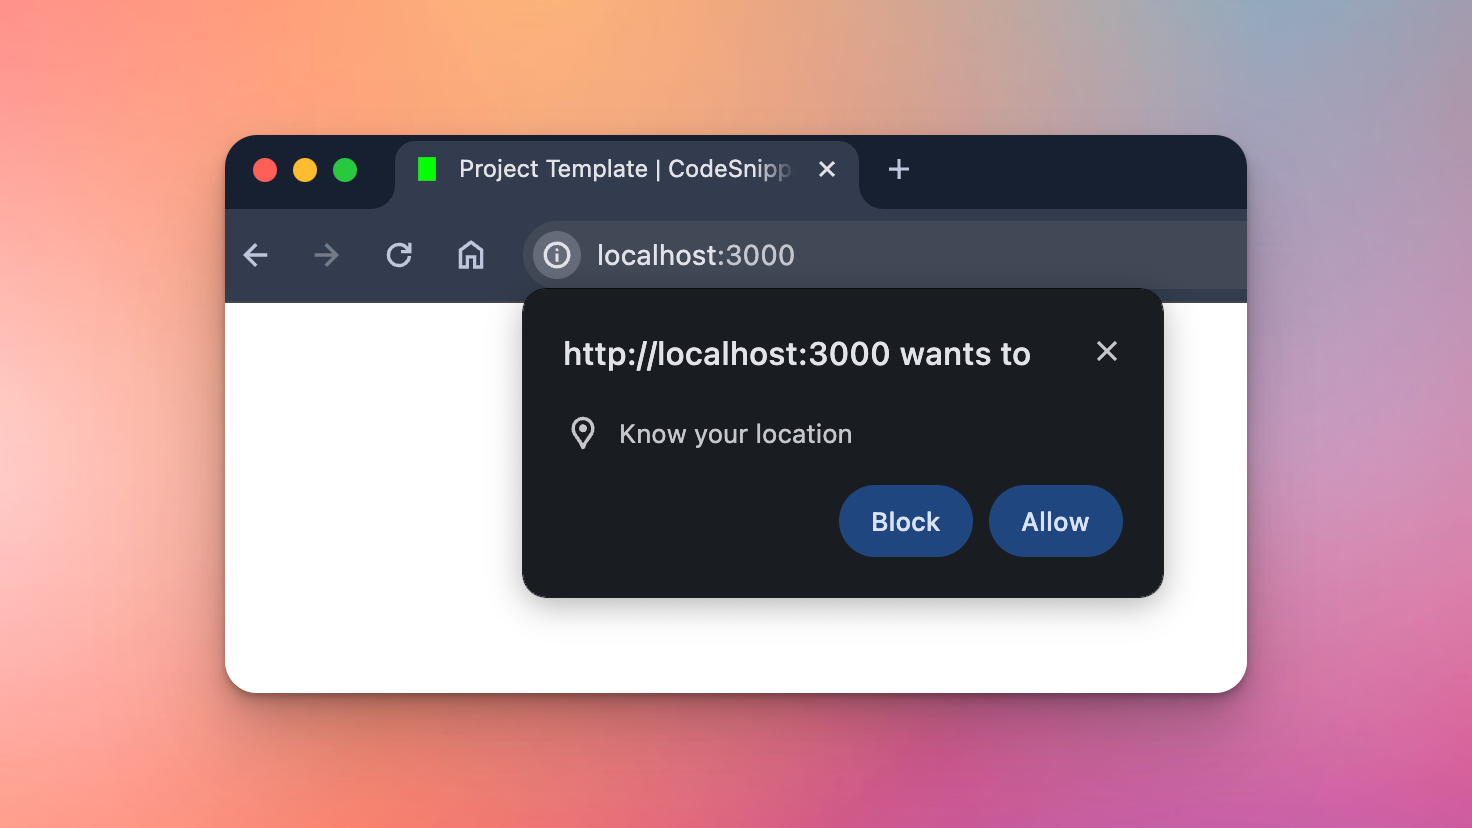
Now if we go back to our browser and load the app at http://localhost:3000, we'll first see a prompt that asks us to allow location access from localhost:3000, and then afterwards, we'll see an alert that displays your approximate latitude and longitude!

Fetching the weather data from our server
Now that we have our app shell built out, and we have the user's coordinates, it's time to write the function that makes the API request from our frontend to our backend, and displays the weather data accordingly.
Let's add a function called getWeather() to app/client/index.js
@@ -14,4 +14,50 @@ function getLocation() {
     }
 }

+async function getWeather(lat, lon) {
+    const res = await fetch('/api/current-weather', {
+        method: 'POST',
+        headers: {
+            'Content-Type': 'application/json',
+        },
+        body: JSON.stringify({ lat, lon }),
+    });
+
+    // destructure the response body
+    const { city, icon, description, currentTemp, minTemp, maxTemp } = await res.json();
+
+    // if the response is not ok, alert the user
+    if (!res.ok) {
+        console.log(res);
+        alert("Unable to get weather data");
+        return;
+    }
+
+    // otherwise, hide loader and display weather data
+    const loaderElement = document.getElementById('loader');
+    loaderElement.classList.add('hidden');
+
+    const containerElement = document.getElementById('container');
+    containerElement.classList.remove('hidden');
+
+    const cityElement = document.getElementById('city');
+    cityElement.innerHTML = city;
+
+    const iconElement = document.getElementById('icon');
+    iconElement.src = icon;
+
+    const descriptionElement = document.getElementById('description');
+    descriptionElement.innerHTML = description;
+
+    const currentTempElement = document.getElementById('currentTemp');
+    currentTempElement.innerHTML = `${currentTemp}°F`;
+
+    const minTempElement = document.getElementById('minTemp');
+    minTempElement.innerHTML = `${minTemp}°F`;
+
+    const maxTempElement = document.getElementById('maxTemp');
+    maxTempElement.innerHTML = `${maxTemp}°F`;
+
+}
+
 window.onload = getLocation;
This function accepts the lat and lon as arguments, sends a request to our server with the lat and lon, extracts the weather data from the response, and injects the data into the HTML.
If you reload the app, you won't see anything new though. That's because we have to actually call this function with the user's coordinates.
We can do that from within the getLocation() function we wired up earlier that is currently displaying the alert with the user's latitude and longitude.
From with the getLocation() function body, in client/app/index.js, make this update to remove the alert and instead call the getWeather function like so:
@@ -6,8 +6,11 @@ function getLocation() {
         navigator.geolocation.getCurrentPosition((position) => {
             const { latitude, longitude } = position.coords;

-            // display the user's coordinates
-            alert(`Latitude: ${latitude}, Longitude: ${longitude}`);
+            // using the coordinates, send a request to our server
+            getWeather(latitude, longitude).catch((err) => {
+                alert("Unable to get weather data");
+                console.error(`Error getting weather data`, err);
+            })
         });
     } else {
         alert("Geolocation is not supported by this browser.");
At this point, it's time to reload our app and witness the magic!
Weather app demo
Hop on over to http://localhost:3000, refresh the page, and admire your hard work!
Now you can easily check the weather without being bombarded with ads from the other lame weather sites.
What's next?
You have this fancy new weather app that you can show off to others. But still, you might be asking yourself "...now what?".
I've always found it was best when I was following a tutorial to stray off-script a bit and add my own little features and tweaks so I could solidify what I had learned and possibly learn a few extra things along the way.
I recommend you do the same!
Some possible features and enhancements
- Allow the user to manually enter a city and state and display the weather accordingly
- Display a 5-day forecast
- Change the background and border colors depending on the weather or temperature
- Add a fahrenheit/celcius toggle
- Display air quality data
- ...and anything else you can think of!
Wait – one more thing! 👇
Your community awaits!
If you liked this post and learned something new, I encourage you to subscribe below and also check out our community – pairprogram.com!
We are a group of lifelong learners that focus on building job-ready programming skills and habits that will level-up your career! Share daily updates with the community, stay accountable, and complete fun, hyper-personalized tasks tailored to your interests and desired career paths!
Help us improve our content