GitHub API Tutorial (Original)
Build a simple web application by learning the fundamentals of the GitHub API and then display dynamic data to the front-end!

fetch method as opposed to XmlHttpRequest. Click here to view the updated tutorial.GitHub is one of the best ways to collaborate on software and discover new projects using Git, the popular Version Control System (VCS). It's safe to say that GitHub is a huge part of the Open Source Software movement that is continually pushing the bounds of technology as we know it by helping developers contribute to more projects and network with other developers.
GitHub has also created an awesome API for us to build applications with, and the good news is that it's really easy to get started.
Using the GitHub API
Let's take a look at how we can start working with some GitHub API endpoints. GitHub's API makes it nice and simple to put together a request that will return a users GitHub repositories and all of the corresponding data for each repo. This example below will give us the first 30 repos for my username, timmywheels:
https://api.github.com/users/timmywheels/repos
Copy & paste this url 👆 into your browser 💻
Or click here if you're feeling lazy 😏. This is an API endpoint that GitHub has provided that allows us to return the repos for a specified user in JSON format. In this case, you should see something similar to this below:
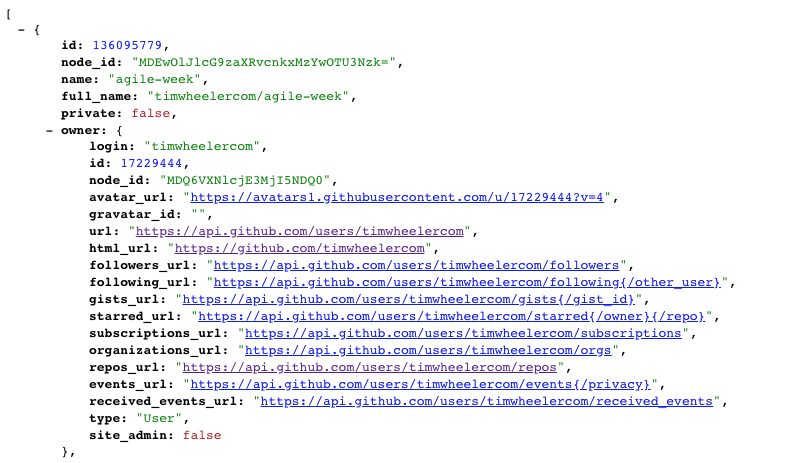
🔥🔥PRO TIP: If your JSON isn't nicely formatted like the image above, I highly recommend you download the free JSONView Chrome Extension here🔥🔥
Setup a Connection to GitHub's API Server
Let's set up an XMLHttpRequest which will allow us to create a connection with GitHub's API server and request data from it.
The beauty of XMLHttpRequest's are that almost all browsers have them built in, and more importantly they give us a way to update webpages without needing to refresh them, and they allow us to request, receive, and send data. Read more about XMLHttpRequest's here.
Create API Function Wrapper
Let's wrap our entire GitHub API call into a function so that we can dynamically pass in the GitHub username that we'd like to request info for.
function requestUserRepos(username){

}
Instantiate a new XMLHttpRequest object
To follow along, you can do all of this right from your Chrome browser console.
Let's instantiate a new instance of an XMLHttpRequest like so:
function requestUserRepos(username){

    // create new XMLHttpRequest object
    const xhr = new XMLHttpRequest();

}
Define Our GitHub API Endpoint
There are quite a few different endpoints we can use depending on what data we'd like to request from GitHub's API. For this example, we will be requesting the GitHub repositories for a specified user.
NOTE: For a list of all available GitHub API endpoints, click here
Let's take the username argument that we're passing into to our function and use that dynamically within the GitHub API endpoint like so:
function requestUserRepos(username){

    // create new XMLHttpRequest object
    const xhr = new XMLHttpRequest();

    // GitHub endpoint, dynamically passing in specified username
    const url = `https://api.github.com/users/${username}/repos`;

}
NOTE: Make sure you use back-ticks and not single or double quotes for the url variable.
Establishing the Connection to GitHub's Server
Since we will be requesting data from GitHub, we will need to specify open our connection and specify that we will be using a
GET request, as opposed to a POST request which would mean we would be sending data.
function requestUserRepos(username){

    // create new XMLHttpRequest object
    const xhr = new XMLHttpRequest();

    // GitHub endpoint, dynamically passing in specified username
    const url = `https://api.github.com/users/${username}/repos`;

    // Open a new connection, using a GET request via URL endpoint
    // Providing 3 arguments (GET/POST, The URL, Async True/False)
    xhr.open('GET', url, true);

}
Send Request & Parse Returned Data into JSON
Once, we've opened our connection to the GitHub API, we can specify what we want to do with our data using the .onload method.
Most importantly, we also need to make sure we actually send our request to GitHub's server using the .send() method.
So just to recap - we're opening our connection to GitHub's server (xhr.open(...)), we're then sending our request to GitHub (xhr.send()), and once our request has been received (xhr.onload), we will run a function that will parse the data. Let's see what the code looks like:
function requestUserRepos(username){

    // Create new XMLHttpRequest object
    const xhr = new XMLHttpRequest();

    // GitHub endpoint, dynamically passing in specified username
    const url = `https://api.github.com/users/${username}/repos`;

    // Open a new connection, using a GET request via URL endpoint
    // Providing 3 arguments (GET/POST, The URL, Async True/False)
    xhr.open('GET', url, true);

    // When request is received
    // Process it here
    xhr.onload = function() {

        // Parse API data into JSON
        const data = JSON.parse(this.response);

        // Log the response
        console.log(data);

    }

    // Send the request to the server
    xhr.send();

}

// Call function passing in 'facebook' as GitHub username
requestUserRepos('facebook');
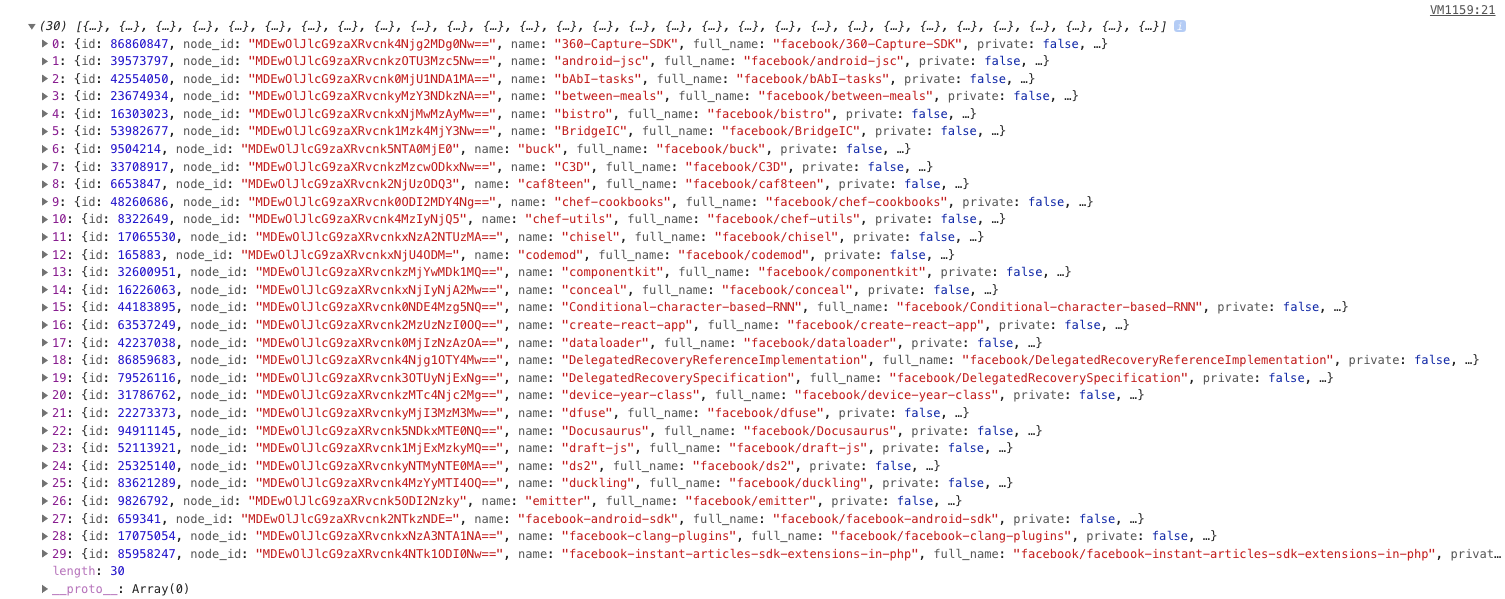
Viewing the Entire API Response
After running the code above, you will see a response that returns an array of 30 objects. Each object contains information about a particular repository. GitHub's API, by default, is set to return the first 30 repos for that particular user in alphabetical order.
You should see something similar to this:
👏👏👏 Awesome! 👏👏👏
We're now working with the GitHub API. With that said, let's keep it moving and see how we can access some more information using our API request that we have in place.
Accessing the API Data
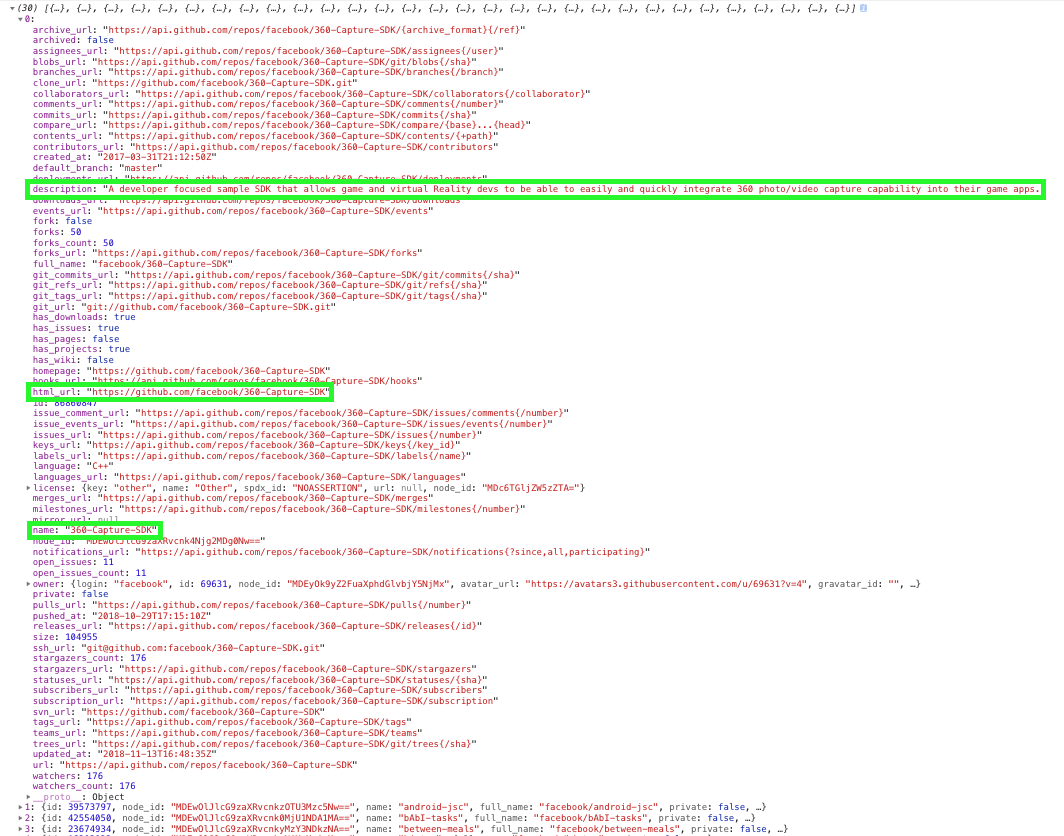
Let's say that we wanted to retrieve the name, description, and url for each repo that is returned in our API response.
You'll notice that if you expand the individual objects from the API response, they'll contain all of the information that we're looking for. In our case, we'll want to grab the name, description, and html_url keys from each object within the data array.
To get that information, we'll just need to run a simple loop over the data object that's being returned to us in the response, then we can console.log it.
function requestUserRepos(username){

    // Create new XMLHttpRequest object
    const xhr = new XMLHttpRequest();

    // GitHub endpoint, dynamically passing in specified username
    const url = `https://api.github.com/users/${username}/repos`;

    // Open a new connection, using a GET request via URL endpoint
    // Providing 3 arguments (GET/POST, The URL, Async True/False)
    xhr.open('GET', url, true);

    // When request is received
    // Process it here
    xhr.onload = function() {

        // Parse API data into JSON
        const data = JSON.parse(this.response);

        // Log the response
        console.log(data);

        // Loop over each object in data array
        for (let i in data) {

            // Log the repo name
            console.log('Repo:', data[i].name);

            // Log the repo description
            console.log('Description:', data[i].description);

            // Log the repo url
            console.log('URL:', data[i].html_url);

            // Add a separator between each repo
            console.log('=========================')

        }

    }

    // Send the request to the server
    xhr.send();

}

// Call function passing in 'facebook' as GitHub username
requestUserRepos('facebook');
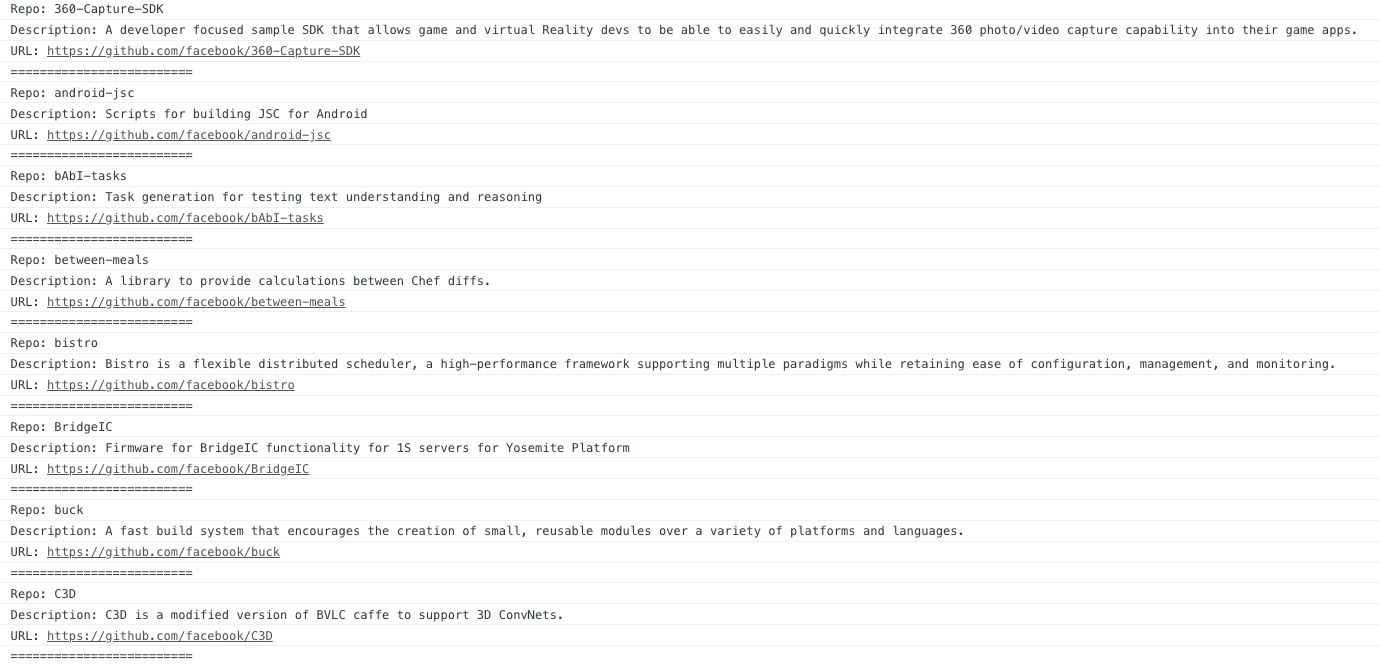
Viewing the Requested API Data 👀
Nice! Now we have our GitHub API data formatted into something that's a little easier to read.
So Now What?
Now that we've setup our GitHub API request, we'd naturally want to display this somewhere to the users of our application, and not just in the browser console. So how do we do that?
Creating a Simple GitHub API Example Application
Let's setup a simple project that will display the data of the specified username right on our webpage.
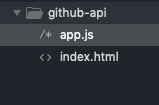
1. Create directory named github-api on your desktop
Let's create directory on our desktop named github-api which will hold the files to our simple GitHub API example application.
2. Within github-api directory, add file index.html
This file will contain the HTML markup for our web app.
3. Within github-api directory, add file app.js
This file will contain the code we just wrote. We will tweak it along the way to get it to display the requested data on the webpage.
Our index.html file
This one will be pretty straight forward. Just some simple HTML boilerplate with an h3, a form, a ul, and a link to the app.js file.
Just to spice things up, we will also import the Bootstrap CSS Library and add a few Bootstrap classes to our HTML elements.
NOTE: Bootstrap is definitely not necessary to get your GitHub app working, but for the sake of making it look half decent, I've decided to use it.
We will use the Bootstrap CSS CDN:
You can find the docs for the CDN here: https://getbootstrap.com/docs/4.1/getting-started/introduction/
<link rel="stylesheet" href="https://stackpath.bootstrapcdn.com/bootstrap/4.1.3/css/bootstrap.min.css" integrity="sha384-MCw98/SFnGE8fJT3GXwEOngsV7Zt27NXFoaoApmYm81iuXoPkFOJwJ8ERdknLPMO" crossorigin="anonymous">
We will use a few common Bootstrap classes:
I have linked to the corresponding sections of the Bootstrap documentation for each of the classes here.
.text-center| Used for text alignment | View Documentation.mt-5,.mx-auto,.mb-5,.ml-2| Used for margins | View Documentation.form-inline| Used for making form fields inline | View Documentation.form-control| Used for general appearance of form fields | View Documentation.btn| Used for general appearance of buttons | View Documentation.btn-primary| Button appearance modifier class | View Documentation.list-group| General unordered list styling | View Documentation.list-group-item| General unordered list item styling | View Documentation
NOTE: The .list-group-item class only gets used in our app.js file
All in all, there's not much to the Bootstrap classes I've added to this app, however, I wanted to make sure to get you started off on the right track. From here you can certainly put your own spin on things and truly make it your own.
<!DOCTYPE html>
<html lang="en">
<head>
	<meta charset="UTF-8">
	<title>GitHub API</title>

	<!-- Import the Bootstrap CSS CDN -->
	<link rel="stylesheet" href="https://stackpath.bootstrapcdn.com/bootstrap/4.1.3/css/bootstrap.min.css" integrity="sha384-MCw98/SFnGE8fJT3GXwEOngsV7Zt27NXFoaoApmYm81iuXoPkFOJwJ8ERdknLPMO" crossorigin="anonymous">

</head>
<body>

	<h3 class="text-center mt-5">GitHub API</h3>
	<form id="gitHubForm" class="form-inline mx-auto" style="width: 280px">
		<input id="usernameInput" class="form-control mb-5" type="text" name="username" placeholder="GitHub Username">
		<input type="submit" class="btn btn-primary ml-2 mb-5" value="Submit">
	</form>
	<ul id="userRepos" class="list-group mx-auto mb-5" style="width: 500px">

	</ul>

	<script src="app.js"></script>
</body>
</html>
Our app.js file
This will be mostly similar to the code we wrote earlier. The main differences will be that we need to retrieve the user's input from the GitHub username form, and pass that into our requestUserRepos() function from earlier, then we need to attach the data from our API request to the DOM. We can do this by grabbing on to the ul with an ID of userRepos and appending the data as li's within the ul all from within the for-loop inside the xhr.onload method. Let's give it a shot:
// Get the GitHub username input form
const gitHubForm = document.getElementById('gitHubForm');

// Listen for submissions on GitHub username input form
gitHubForm.addEventListener('submit', (e) => {

    // Prevent default form submission action
    e.preventDefault();

    // Get the GitHub username input field on the DOM
    let usernameInput = document.getElementById('usernameInput');

    // Get the value of the GitHub username input field
    let gitHubUsername = usernameInput.value;

    // Run GitHub API function, passing in the GitHub username
    requestUserRepos(gitHubUsername);

})


function requestUserRepos(username){

    // Create new XMLHttpRequest object
    const xhr = new XMLHttpRequest();

    // GitHub endpoint, dynamically passing in specified username
    const url = `https://api.github.com/users/${username}/repos`;

    // Open a new connection, using a GET request via URL endpoint
    // Providing 3 arguments (GET/POST, The URL, Async True/False)
    xhr.open('GET', url, true);

    // When request is received
    // Process it here
    xhr.onload = function () {

        // Parse API data into JSON
        const data = JSON.parse(this.response);

        // Loop over each object in data array
        for (let i in data) {

            // Get the ul with id of of userRepos
            let ul = document.getElementById('userRepos');

            // Create variable that will create li's to be added to ul
            let li = document.createElement('li');

            // Add Bootstrap list item class to each li
            li.classList.add('list-group-item')

            // Create the html markup for each li
            li.innerHTML = (`
                <p><strong>Repo:</strong> ${data[i].name}</p>
                <p><strong>Description:</strong> ${data[i].description}</p>
                <p><strong>URL:</strong> <a href="${data[i].html_url}">${data[i].html_url}</a></p>
            `);

            // Append each li to the ul
            ul.appendChild(li);

        }

    }

    // Send the request to the server
    xhr.send();

}
Trying Out Our GitHub API App
Now that we've put together all of our code for the front-end markup, our API request, and added some Bootstrap styling - we should be ready to rock.
All you have to do is open up the index.html file in your browser. On a Mac, you can just double-click the file itself, or right-click > Open With > Google Chrome.
Our Simple App UI
And there it is! Here's what all of our hardworks gone into. This will give you a great framework to build upon and expand your app.

Enter a GitHub Username
Now for the fun part. Enter your GitHub username or even ones like facebook, airbnb, reactjs, or mine - timmywheels.
Here's the results I got when I plugged in facebook:
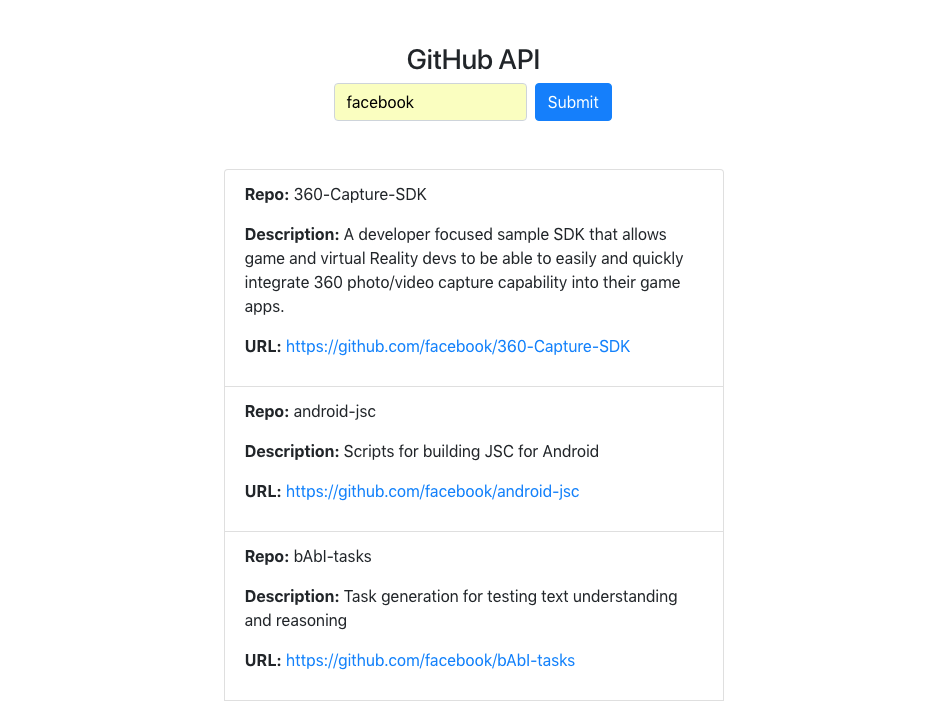
Congratulations, Hacker!
You have successfully built a web application that makes a request to the GitHub API and displays dynamic data to users on the front-end inside the browser! Really cool stuff.
Complete Source Code
Here's a link to the working source code to this tutorial: https://github.com/timmywheels/github-api-tutorial
Stay Tuned 📺
If you have any questions or improvements, or if you'd like to see additional examples, feel free to reach out to me anytime at [email protected]. If you're enjoying my posts, please subscribe below! 👇
Help us improve our content